For post-processing a solid domain result from CalculiX along with a fluid region data set from OpenFOAM, it is necessary to convert the CalculiX '.frd' file to a format that ParaView can read in. In this article, we will install and validate Ihor Mirzov’s Python implementation of ccx2paraview.
The instructions given are for a Ubuntu 21.04 system, but it should also work for Ubuntu 20.04 and other Ubuntu-compatible distributions with Pop!_OS inclusive.
Preparation
1: This article assumes that you employ some virtualisation technique (e.g. Conda environments) and perform the pip3 install command from inside a virtual Python container. If you do not use Anaconda ecosystem, I recommend creating a lightweight virtual environment by referring to the latest Python and Virtual Environments tutorial (the Virtualising exercise: venv section) from Solvercube LearnPress (registration not required for free articles). Also check out channel videos from Solvercube Channel.
2: Install ParaView referring to the latest ParaView installation tutorial from Solvercube LearnPress (registration not required for free articles). Also check out channel videos from Solvercube Channel.
3: Install CalculiX referring to the latest CalculiX installation tutorial from Solvercube LearnPress (registration not required for free articles). Also check out channel videos from Solvercube Channel.
Conversion using ccx2paraview module
In this section, we will install the ccx2paraview package using the Python 3’s Pip tool (aka Pip3 or pip for Python 3). This and the following sections assume that you have installed CalculiX 2.17 example data to '~/CalculiX/ccx_2.17/test/'.
1) Activate a virtual environment (say, Venv), and install the NumPy, Vtk, and ccx2paraview packages using pip3:
(Venv) $ pip3 install numpy vtk ccx2paraview (1)
| 1 | The tagged prompt (Venv) $ indicates that you are typing in a virtual environment. |
2) Copy and paste the whole command block to the terminal window to generate a sample CalculiX data set (It will generate a result file, 'beamp.frd'):
mkdir -p ~/temp/test/ccx2paraview/
cd ~/temp/test/ccx2paraview/
cp ~/CalculiX/ccx_2.17/test/beamp.inp .
ccx beamp | tee beamp.log
(1)| 1 | An extra blank line is intended for the last command line to be parsed on pasting. |
3) Copy and paste the following block to generate a sample Python code for converting the above result set for ParaView (Don’t worry about each line for now)
echo 'import logging
import ccx2paraview
logging.basicConfig(level=logging.INFO, format="%(levelname)s: %(message)s")
c = ccx2paraview.Converter("beamp.frd", ["vtu"])
c.run()
' > beamp2paraview.py
(1)| 1 | An extra blank line is intended for the last command line to be parsed on pasting. |
and run the code by:
(Venv) $ python3 beamp2paraview.py
INFO: Reading beamp.frd
INFO: 261 nodes
INFO: 32 cells
INFO: Step 1, time 1.0, U, 3 components, 261 values
INFO: 1 time increment

INFO: Writing beamp.vtu
INFO: Step 1, time 1.0, U, 3 components, 261 values
Running the above code converts the given '.frd' data to the '.vtu' format.
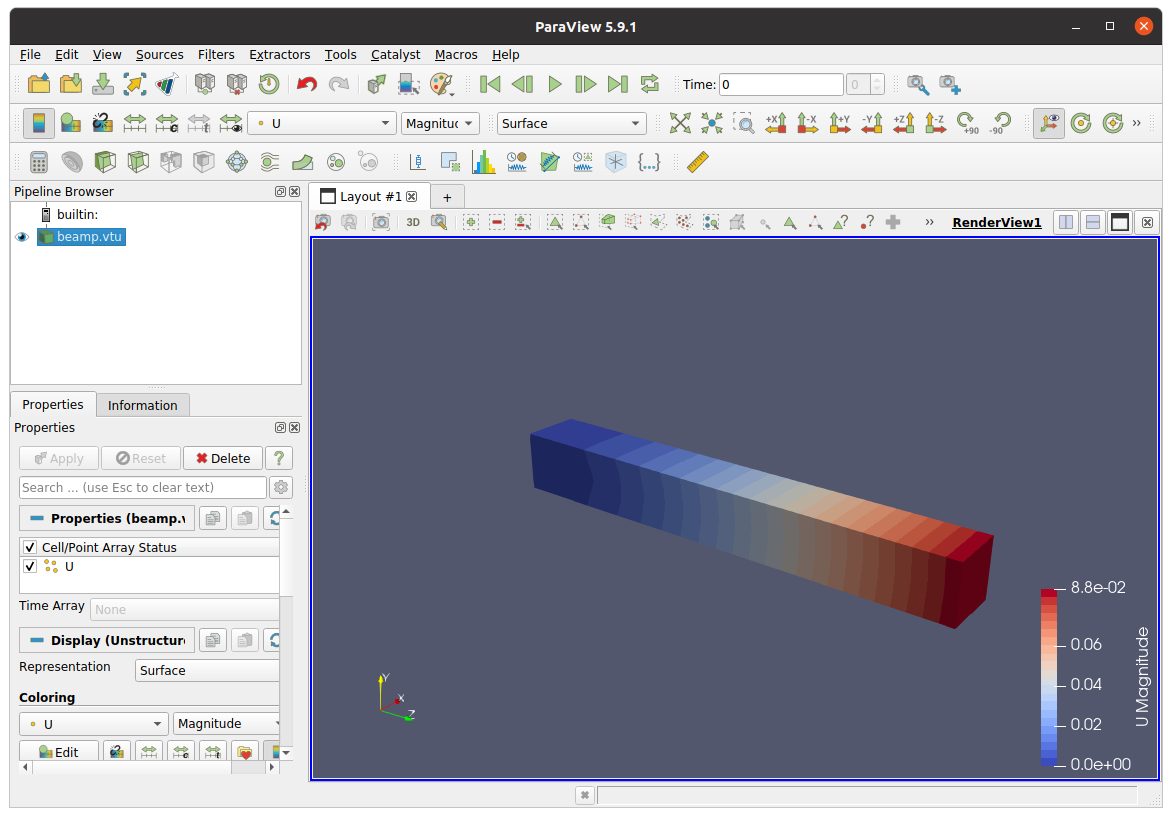
4) Launch ParaView to visualise the '.vtu' data accordingly.
(Venv) $ paraview --data=beamp.vtu &
(Optional) Compiling the ccx2paraview package
If you find the ccx2paraview module helpful, you can consider making it a binary runtime (so that you do not need to implement the conversion coding each time). To achieve this, you need (1) the ccx2paraview source package and (2) a Python code compiler (e.g. PyInstaller or Nuitka).
1) First, download the latest ccx2paraview source package from https://github.com/calculix/ccx2paraview. Unzip the content under a dedicated sub-package folder (e.g. '~/CalculiX/ccx2paraview-3.0.0/').
$ tree ~/CalculiX/ccx2paraview-3.0.0/
/home/hawk/CalculiX/ccx2paraview-3.0.0/
├── ccx2paraview
│   ├── clean.py
│   ├── frd2vtk.py
│   ├── __init__.py
│   ├── reader.py
│   └── writer.py
├── img_baffle.png
├── img_blades.png
├── LICENSE
├── README.md
├── requirements.txt
├── setup.py
└── tests
    ├── log.py
    ├── test.log
    └── test.py

2 directories, 14 files
2) Restart the previous virtual Python environment and install the Nuitka package using pip3:
(Venv) $ pip3 install nuitka
Collecting nuitka
  Downloading Nuitka-0.6.16.2.tar.gz (3.0 MB)
     |████████████████████████████████| 3.0 MB 213 kB/s
Using legacy 'setup.py install' for nuitka, since package 'wheel' is not installed.
Installing collected packages: nuitka
    Running setup.py install for nuitka ... done
Successfully installed nuitka-0.6.16.2
3) Navigate to where the __init__.py file sits, and then run Nuitka to compile it:
(Venv) $ python3 -m nuitka --follow-imports __init__.py
Nuitka-Options:INFO: Used command line options: --follow-imports __init__.py
Nuitka:INFO: Starting Python compilation with Nuitka '0.6.16.2' on Python '3.9' commercial None.
Nuitka-Plugins:INFO: implicit-imports: Implicit dependencies of module 'numpy' added 'numpy.compat,numpy.lib,numpy.linalg,numpy.fft,numpy.polynomial,numpy.random,numpy.random._bounded_integers,numpy.random._common,numpy.random._generator,numpy.random._mt19937,numpy.random._pcg64,numpy.random._philox,numpy.random._sfc64,numpy.random.bit_generator,numpy.random.mtrand,numpy.ctypeslib,numpy.ma,numpy.matrixlib'.
Nuitka-Plugins:INFO: implicit-imports: Implicit dependencies of module 'pkg_resources.extern' added 'pkg_resources._vendor.packaging,pkg_resources._vendor.pyparsing,pkg_resources._vendor.six,pkg_resources._vendor.appdirs'.
Nuitka-Plugins:INFO: implicit-imports: Implicit dependencies of module 'pkg_resources._vendor.packaging' added 'pkg_resources._vendor.packaging.version,pkg_resources._vendor.packaging.specifiers,pkg_resources._vendor.packaging.requirements'.
Nuitka-Plugins:INFO: implicit-imports: Implicit dependencies of module 'numpy.random' added 'numpy.random._bounded_integers,numpy.random._common,numpy.random._generator,numpy.random._mt19937,numpy.random._pcg64,numpy.random._philox,numpy.random._sfc64,numpy.random.bit_generator,numpy.random.mtrand'.
Nuitka-Plugins:INFO: implicit-imports: Implicit dependencies of module 'numpy.core' added 'numpy.core._dtype_ctypes,numpy.core._multiarray_tests'.
Nuitka:INFO: Completed Python level compilation and optimization.
Nuitka:INFO: Generating source code for C backend compiler.
Nuitka:INFO: Running data composer tool for optimal constant value handling.
Nuitka:INFO: Running C level backend compilation via Scons.
Nuitka-Scons:INFO: Backend C compiler: gcc (gcc).
Nuitka-Scons:WARNING: You are not using ccache.
Nuitka:INFO: Keeping build directory '__init__.build'.
Nuitka:INFO: Successfully created '__init__.bin'.
4) When the compilation is complete, relocate the binary executable, namely, __init__.bin to your '/usr/local/bin' folder as ccx2paraview.
(Venv) $ sudo mv __init__.bin /usr/local/bin/ccx2paraview
5) To test run the compiled version, deactivate from the virtual environment, navigate to the previous test folder (i.e. '~/temp/test/ccx2paraview/'), and then enter the following command:
$ ccx2paraview beamp.frd vtu
The output should be the same as with the script version.
INFO: Reading beamp.frd
INFO: 261 nodes
INFO: 32 cells
INFO: Step 1, time 1.0, U, 3 components, 261 values
INFO: 1 time increment

INFO: Writing beamp.vtu
INFO: Step 1, time 1.0, U, 3 components, 261 values
| Remember that we compiled the Python code from within a virtual environment (because it required to install several packages), but we placed the compiled binary in the system '/usr/local/bin/' directory, meaning we don’t need to activate the virtual environment to use the executable. |