This article provides step-by-step instructions on how to install Node.js on a personal computer running on Windows 10.
Preparation
1: Get the latest the LTS (Long Term Support) release of Node.js from https://nodejs.org/en/.
-
The current file used: node-v14.17.0-x64.msi
2: (Optional) If wanting to set up Node Version Manager (NVM) for Windows, get the latest nvm-windows setup file from https://github.com/coreybutler/nvm-windows/releases.
-
The current release used: 1.1.7 (released on Aug 2, 2018)
Setup Wizard
Run the '.msi' file as administrator.
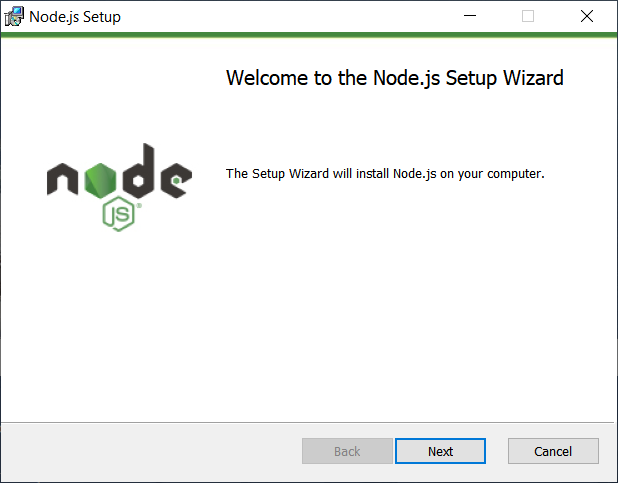
1) Click Next.
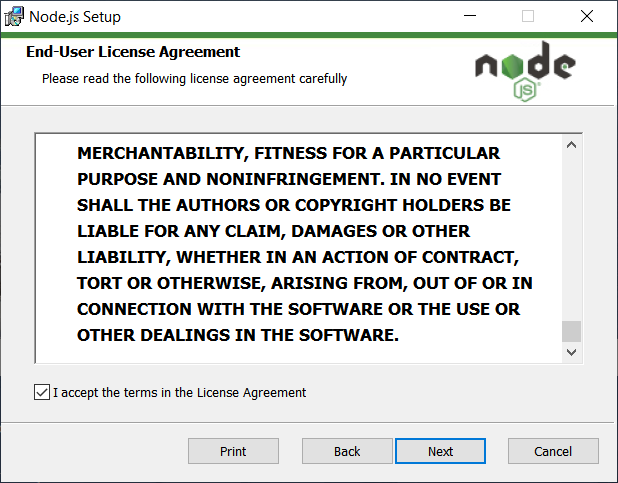
2) Read through the license information and tick on the I accept the terms in the License Agreement option — if you agree. Click Next.
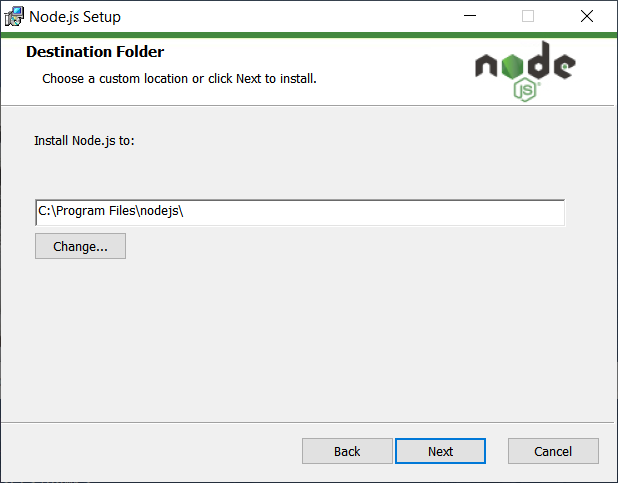
3) Accept the default destination folder and click Next.
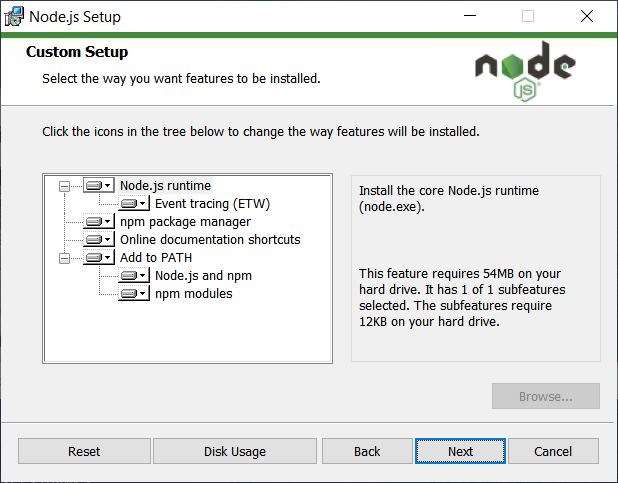
4) Keep the default configuration intact and click Next.
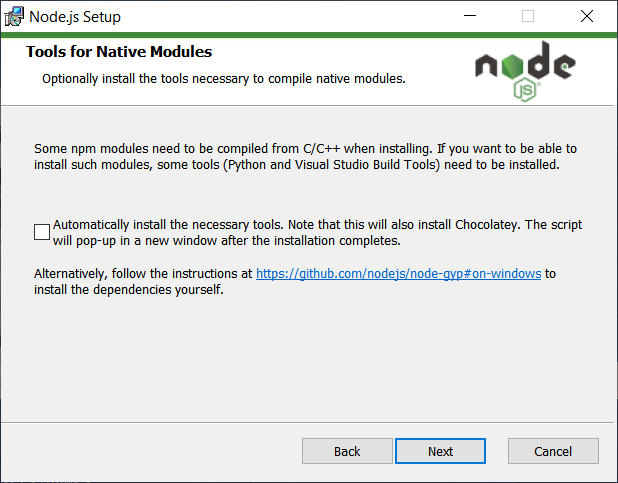
5) Leave this advanced option unselected for now. Click Next.
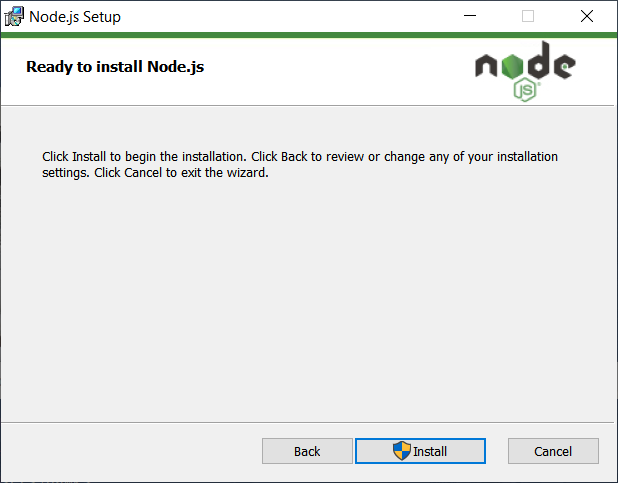
6) Click Install to proceed.
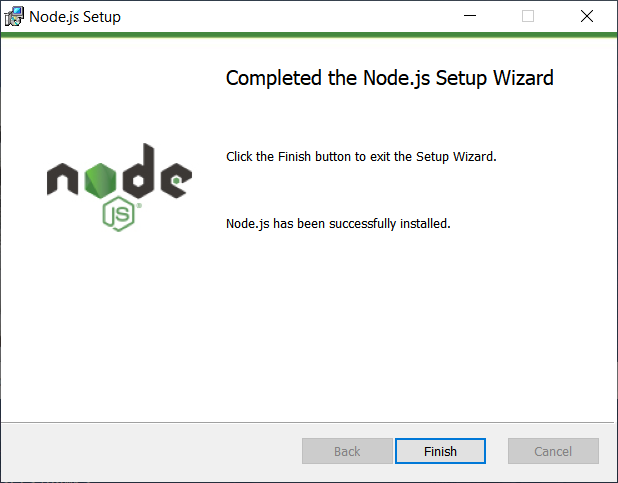
7) When the installation is complete, click Finish to exit from the Setup Wizard.
Path to Node.js executables
Check if the path to the Node.js executables is added to the system Path variable:
-
C:\Program Files\nodejs\
Also, the path to the NPM (Node Package Manager) executables:
-
C:\Users\hawk\AppData\Roaming\npm
Open a PowerShell to check the installation by the version:
> node --version (1)
| 1 | The leading symbol > indicates that you are typing at a PowerShell. |
v14.17.0
Also, the version of NPM, the Node.js Package Manager.
> npm --version
6.14.13
'Hello, World!' using Node.js
In this section, we will test our installation of Node.js using a simple web application.
Using any text editor (eg, Notepad++ or SciTE, etc), enter — or cut-and-paste — the below content and save it as "helloWorld.js" to a local work folder.
 1
 2
 3
 4
 5
 6
 7
 8
 9
10
11
12
13
14
const http = require('http')

const hostname = '127.0.0.1'
const port = 3000

const server = http.createServer((req, res) => {
  res.statusCode = 200
  res.setHeader('Content-Type', 'text/plain')
  res.end('Hello, World!\n')
})

server.listen(port, hostname, () => {
  console.log(Server running at http://${hostname}:${port}/)
})
Open a PowerShell and run the script using node
> node .\helloWorld.js
which should print out a message similar to the following:
Server running at http://127.0.0.1:3000/
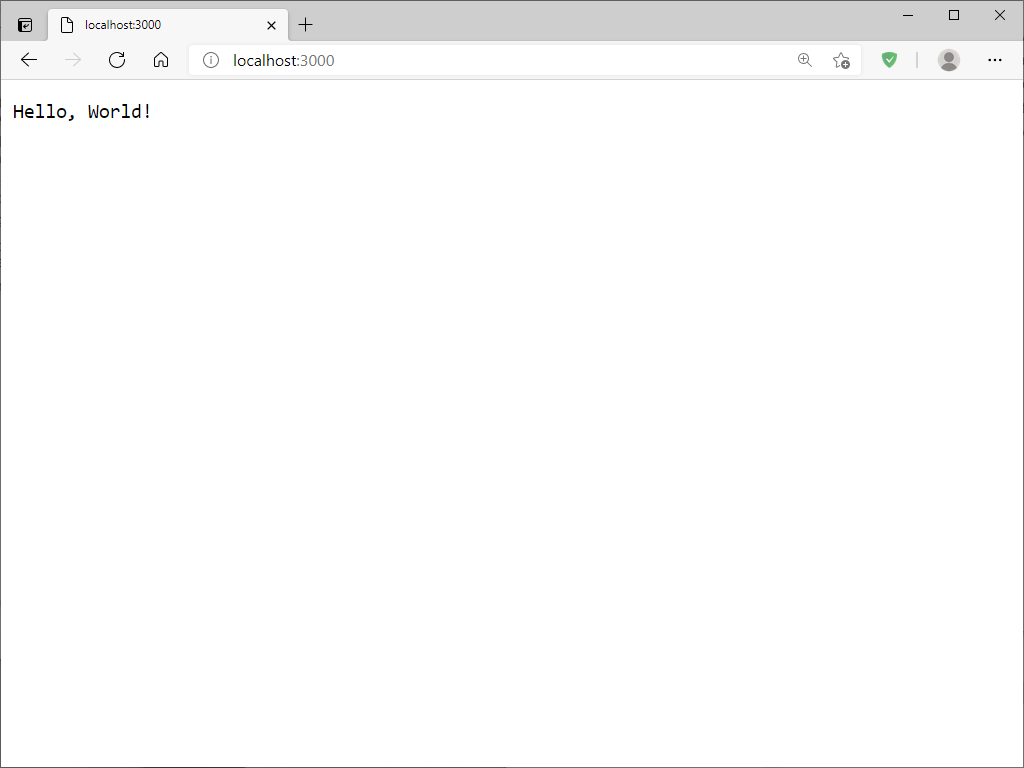
To see the processed output, type below command in a browser address bar:
localhost:3000
To shut down the server, press Ctrl+C from inside the PowerShell. Also, close the browser tab accordingly.
(Optional) NVM for Windows
NVM is a Node.js Version Manager for Linux operating system, enabling you to change your Node.js versions on demand if you require different versions of Node.js maintained at hand due to varying dependencies. For Windows users, there is another project, Node Version Manager for Windows (nvm-windows), because the original NVM is designed to work on a POSIX-compliant shell (only).
Extract the downloaded 'nvm-setup.zip' file and run the 'nvm-setup.exe' as administrator.
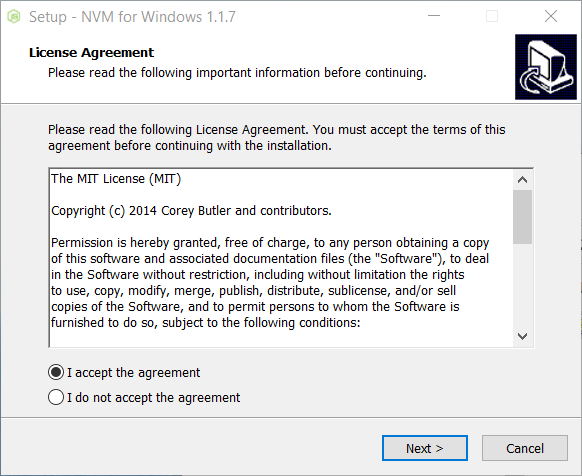
1) Read through the license information and tick on I accept the agreement — if you agree. Click Next >.
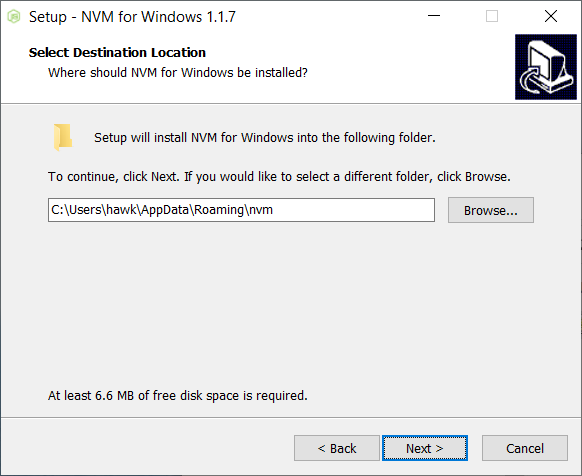
2) With the default destination folder accepted, click Next >.
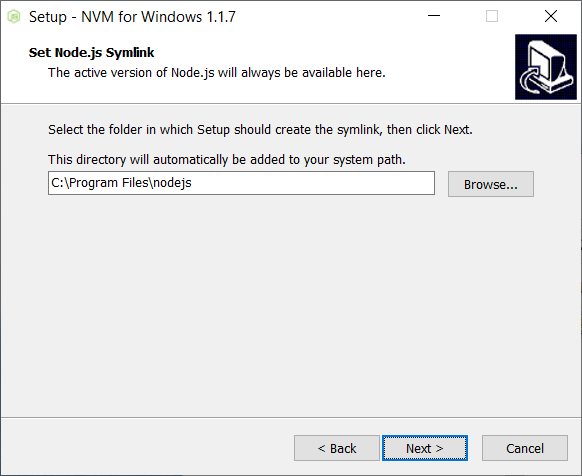
3) See that the Node.js installation folder is correct and click Next >.
4) Click Install to proceed.

5) Answer with Yes — unless you think otherwise.

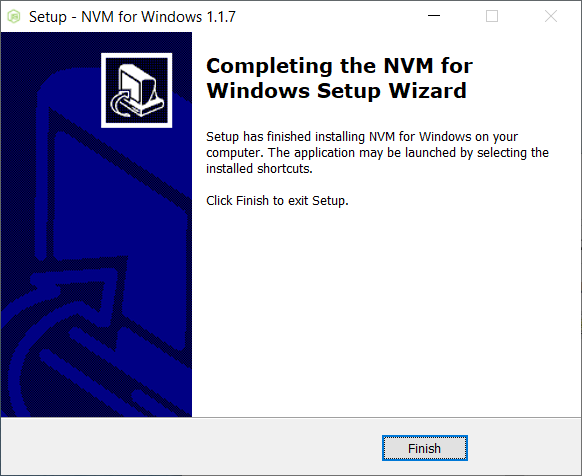
6) When the installation is complete, click Finish to exit from the Setup Wizard.
Open a PowerShell and check your NVM installation by the version:
> nvm --version
Running version 1.1.7.
  :
NVM exercise
With NVM for Windows installed, you can list all the available Node.js versions by:
> nvm list available
|   CURRENT    |     LTS      |  OLD STABLE  | OLD UNSTABLE |
|--------------|--------------|--------------|--------------|
|    16.1.0    |   14.17.0    |   0.12.18    |   0.11.16    |
|    16.0.0    |   14.16.1    |   0.12.17    |   0.11.15    |
|   15.14.0    |   14.16.0    |   0.12.16    |   0.11.14    |
|   15.13.0    |   14.15.5    |   0.12.15    |   0.11.13    |
|   15.12.0    |   14.15.4    |   0.12.14    |   0.11.12    |
|   15.11.0    |   14.15.3    |   0.12.13    |   0.11.11    |
|   15.10.0    |   14.15.2    |   0.12.12    |   0.11.10    |
|    15.9.0    |   14.15.1    |   0.12.11    |    0.11.9    |
|    15.8.0    |   14.15.0    |   0.12.10    |    0.11.8    |
|    15.7.0    |   12.22.1    |    0.12.9    |    0.11.7    |
|    15.6.0    |   12.22.0    |    0.12.8    |    0.11.6    |
|    15.5.1    |   12.21.0    |    0.12.7    |    0.11.5    |
|    15.5.0    |   12.20.2    |    0.12.6    |    0.11.4    |
|    15.4.0    |   12.20.1    |    0.12.5    |    0.11.3    |
|    15.3.0    |   12.20.0    |    0.12.4    |    0.11.2    |
|    15.2.1    |   12.19.1    |    0.12.3    |    0.11.1    |
|    15.2.0    |   12.19.0    |    0.12.2    |    0.11.0    |
|    15.1.0    |   12.18.4    |    0.12.1    |    0.9.12    |
|    15.0.1    |   12.18.3    |    0.12.0    |    0.9.11    |
|    15.0.0    |   12.18.2    |   0.10.48    |    0.9.10    |

This is a partial list. For a complete list, visit https://nodejs.org/download/release
In this article, let us try to install the "latest" Node.js whatever the version may be — ie, in addition to the latest LTS release we installed:
> nvm install latest
Downloading node.js version 16.1.0 (64-bit)...
Complete
Creating C:\Users\hawk\AppData\Roaming\nvm\temp

Downloading npm version 7.11.2... Complete
Installing npm v7.11.2...

Installation complete. If you want to use this version, type

nvm use 16.1.0
The command nvm list will show you what you have on your local computer and which one is currently at work:
> nvm list
    16.1.0
  * 14.17.0 (Currently using 64-bit executable)
To use the version 16.1.0, for example, enter:
> nvm use 16.1.0
Now using node v16.1.0 (64-bit)
See the nvm list output has changed accordingly:
> nvm list
  * 16.1.0 (Currently using 64-bit executable)
    14.17.0
For now, let us wrap up by returning to using the LTS version and deleting the later release.
> nvm use 14.17.0
Now using node v14.17.0 (64-bit)
> nvm uninstall 16.1.0
Uninstalling node v16.1.0... done
NPM 101
Local installation vs global installation
When you install a Node application using NPM, you may do it either locally or globally. Local packages are installed where you are running the npm install command. Local packages will be placed under the 'node_modules' directory in the local location. Global packages, in comparison, are all put in a single place in your system (the exact location depends on your setup) regardless of where you run the npm install command.
If you are going to include the package using a statement like require('package-name') in your '.js' implementation, it suffices you to install it locally. Use the command
npm install <package-name>
If you plan to use the package as a command-line tool, ie, to be available from any folder location, you need to perform a global installation.
npm install -g <package-name>
Which one shall I use?
The developers suggest all packages should be installed locally, even if this might seem a waste of storage space. The reasons are:
-
This allows you to have dozens of applications on your computer, all running different versions of each package as required.
-
It is much safer compared to the possible negative consequences in cases globally updating packages might go mad.
-
Note you can also install executable commands locally and run them using
npx.
That said, a globally installed package enables you to run the executable from any folder location and also becomes reusable across projects. There exist popular global packages such as npm, create-react-app, vue-cli, grunt-cli, etc.
Installing a specific version of a package
To install a specific version of a package, use the command syntax:
npm install <package-name>@<version>
To install a package referenced by a specified tag (eg, something like the latest tag in the npm@latest argument), enter:
npm install <package-name>@<tag>
Uninstalling a Node package
To uninstall a locally installed package, use the following command from your project root folder, ie, the folder that contains the 'node_modules' directory:
npm uninstall <package-name>
If the package is installed globally, use the command syntax:
npm uninstall -g <package-name>