This article explores the system-installed Python on Ubuntu 21.04 Desktop operating system. The later part of this article introduces a way of containerising site installations of Python packages using Python’s Virtualenv module.
The instructions given are for a Ubuntu 21.04 system, but it should also work for Ubuntu 20.04 and other Ubuntu-compatible distributions with Pop!_OS inclusive.
Python versions in Ubuntu Desktop
The Python version that comes pre-installed on Ubuntu 21.04 is Python 3. Python 2 users are now encouraged to switch to Python 3 for new projects because Python 2 is becoming deprecated (See Sunsetting Python 2). That said, Python 2 is still available for installation from the universe repository for some packages that still depend on this version.
Since both lineups will co-exist for a while, the developers recommend you to launch Python 3 using the command name python3 — i.e. the symbolic link connecting to your Python 3 executable at work — leaving python spared for former packages that expect Python 2 by default.
The following routine shows the current Ubuntu 21.04 has Python 3 (only) of the release number 3.9, which you can access by the command python3:
$ which python (1)
| 1 | The prompt symbol $ indicates that you are typing at a terminal emulator (e.g. Ubuntu Terminal). |
(no response)
$ which python2
(no response)
$ which python3
/usr/bin/python3
$ ll $(which python3)
lrwxrwxrwx 1 root root 9 Jul 13 22:38 /usr/bin/python3 -> python3.9*
Pip for Python 3
Pip (aka PIP or pip) is a de facto standard package management system for the Python ecosystem. It allows you to install various Python packages from the Python Package Index (PyPI). Note that Pip is not system-installed in Ubuntu 21.04, so you have to install it manually. As for python3 vs python, Pip for Python 3 will better be designated by pip3 while keeping pip spared for Python 2 for consistency.
| If you employ (or plan to do) virtual environments using Conda, you need to know the implication of installing Python packages wherever your Conda environments can see. We will cover this issue in later sections of the article. |
To install the Pip for Python 3, enter the following command as root (i.e. using the sudo command):
$ sudo apt update && sudo apt install -y python3-pip
You may verify the installation by the version:
$ pip3 --version
pip 20.3.4 from /usr/lib/python3/dist-packages/pip (python 3.9)
Pip, as a package manager, can list all the installed packages using pip3 list:
$ pip3 list
Package                 Version
----------------------- ---------------------
apturl                  0.5.2
blinker                 1.4
Brlapi                  0.8.2
certifi                 2020.6.20
chardet                 4.0.0
chrome-gnome-shell      0.0.0
click                   7.1.2
colorama                0.4.4
command-not-found       0.3
cryptography            3.3.2
cupshelpers             1.0
dbus-python             1.2.16
defer                   1.0.6
distro                  1.5.0
distro-info             1.0
dnspython               1.16.0
ecdsa                   0.16.1
gpg                     1.14.0-unknown
httplib2                0.18.1
idna                    2.10
jeepney                 0.6.0
keyring                 22.2.0
language-selector       0.1
launchpadlib            1.10.13
lazr.restfulclient      0.14.2
lazr.uri                1.0.5
louis                   3.16.0
macaroonbakery          1.3.1
Markdown                3.3.4
meld                    3.20.3
netifaces               0.10.9
oauthlib                3.1.0
olefile                 0.46
pexpect                 4.8.0
Pillow                  8.1.2
pip                     20.3.4
protobuf                3.12.4
pycairo                 1.16.2
pycryptodomex           3.9.7
pycups                  2.0.1
Pygments                2.7.1
PyGObject               3.38.0
PyJWT                   1.7.1
pymacaroons             0.13.0
PyNaCl                  1.4.0
pyRFC3339               1.1
python-apt              2.2.0-ubuntu0.21.04.1
python-dateutil         2.8.1
python-debian           0.1.39
pytz                    2021.1
pyxdg                   0.27
PyYAML                  5.3.1
reportlab               3.5.66
requests                2.25.1
screen-resolution-extra 0.0.0
SecretStorage           3.3.1
setuptools              52.0.0
simplejson              3.17.2
six                     1.15.0
systemd-python          234
ubuntu-advantage-tools  27.0
ubuntu-drivers-common   0.0.0
ufw                     0.36
unattended-upgrades     0.1
urllib3                 1.26.2
usb-creator             0.3.7
wadllib                 1.3.5
wheel                   0.34.2
xdg                     5
xkit                    0.0.0
To display more information about a specific package, use pip3 show <package-name>.
$ pip3 show pip
Name: pip
Version: 20.3.4
Summary: The PyPA recommended tool for installing Python packages.
Home-page: https://pip.pypa.io/
Author: The pip developers
Author-email: distutils-sig@python.org
License: MIT
Location: /usr/lib/python3/dist-packages
Requires:
Required-by:
(Optional) Pip exercise: Pygame
In this section, we add a scenario that we came to know of the Pygame package (a set of Python modules design for writing video games) and want to check it out.
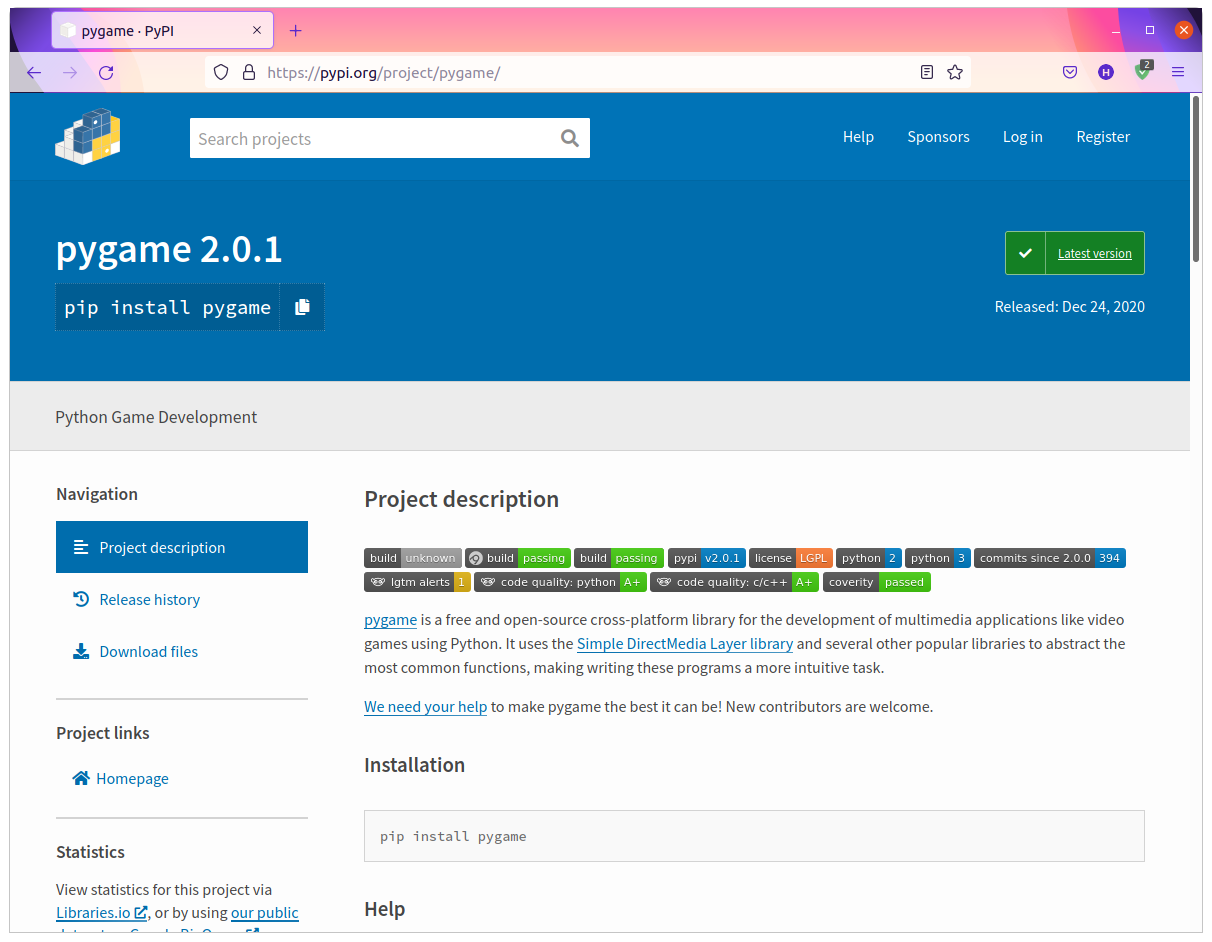
1: Visit the Python Package Index (PyPI) site to see if this package is available for download. If it is not the case, you need to seek specific installation instruction from the package developer’s site or repository (→ not covered in this article).
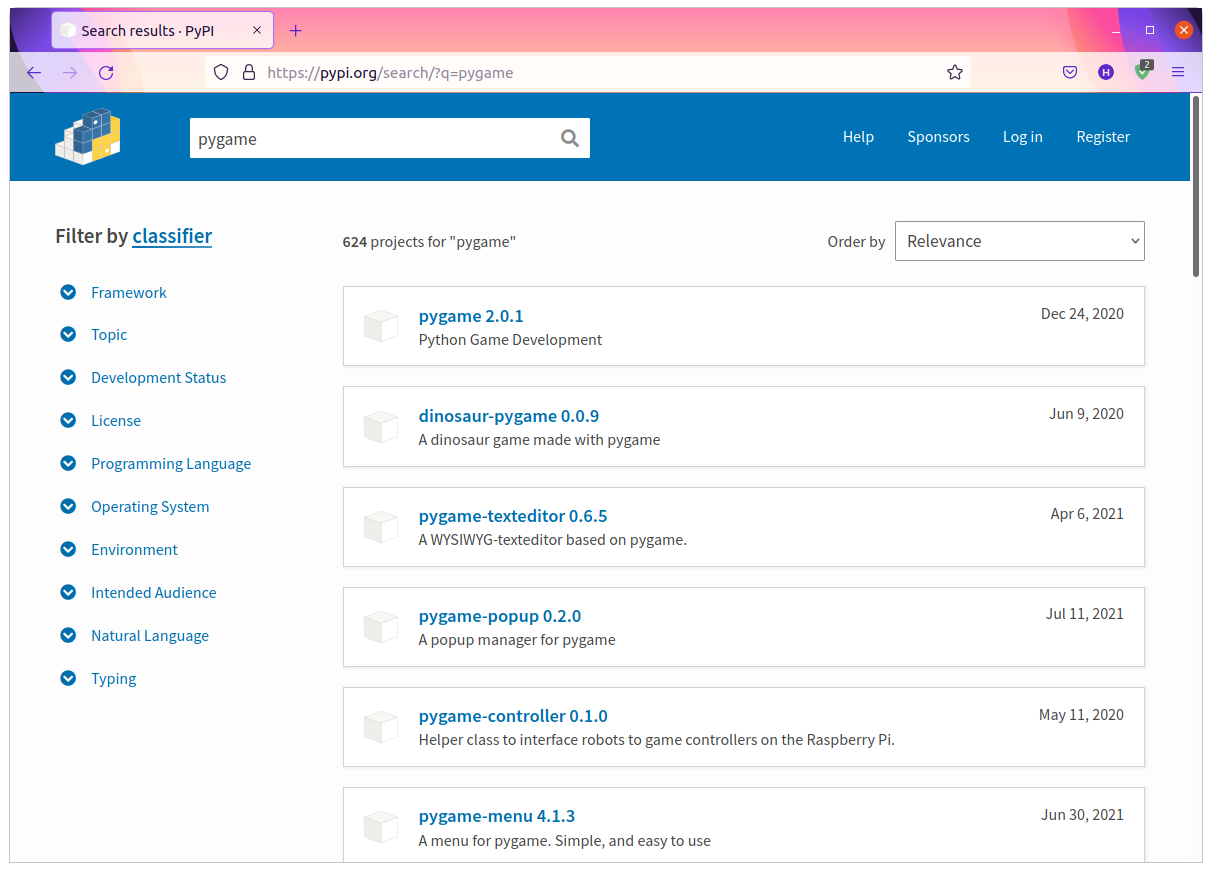
2: If the package is available, PyPI will provide you with installation options and license information, etc.
3: To install the Pygame package, enter from a terminal:
$ pip3 install pygame
Collecting pygame
  Downloading pygame-2.0.1-cp39-cp39-manylinux1_x86_64.whl (11.8 MB)
     |████████████████████████████████| 11.8 MB 1.2 MB/s
Installing collected packages: pygame
Successfully installed pygame-2.0.1
It is worth noting that such a user installation takes your HOME directory for locating the downloaded packages, namely, the site packages. Let us call this location the (user’s) 'site-packages' directory.
$ pip3 show pygame
Name: pygame
Version: 2.0.1
Summary: Python Game Development
Home-page: https://www.pygame.org
Author: A community project.
Author-email: pygame@pygame.org
License: LGPL
Location: /home/hawk/.local/lib/python3.9/site-packages
Requires:
Required-by:
To list only the user site packages, use the pip3 list command with the --user parameter:
$ pip3 list --user
Package Version
------- -------
pygame  2.0.1
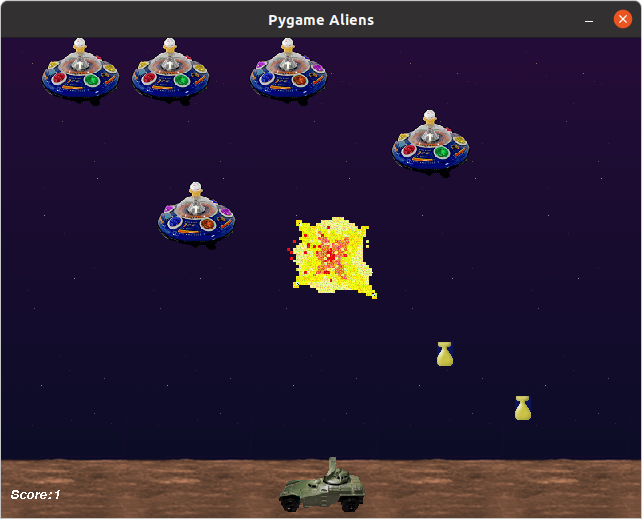
4: You may run one of the demo games to check if your Pygame installation is successful. Make sure you turn down the speaker volume, or your mother would think you are killing time.
$ python3 -m pygame.examples.aliens
5: To delete the Pygame package from your computer, enter from a terminal:
$ pip3 uninstall pygame
"Hello, World!" exercise
To get started with writing Python codes on Ubuntu, any plain text editor such as Ubuntu Desktop’s Text Editor (aka Gedit) — or SciTE, if you prefer a cross-platform tool — is sufficient.
Open a text editor of your choice and type in the following content.
print("Hello, World!")Save it to a local work folder with a name, say, "helloWorld.py", and then exit from the text editor.
To run the Python code, open a terminal and enter the below command from where the '.py' file sits:
$ python3 helloWorld.py
which should print out the text string:
Hello, World!
If you are curious about how to make a Python '.py' file run by itself — for example, for dispatching your code to another person or different computers, you may either:
-
Make the target file an "executable" script, or
-
Compile the code into binaries using external tools.
The first method works as long the computer on which the executable script to be running has a compatible version of Python installed, which is the case on most Linux-based operating systems. The same script would also work even on different operating systems because Python these days are much ubiquitous.
To illustrate this approach, open the 'helloWorld.py' file to add the so-called shebang line at the start of the script file as in (You may either use #!/usr/bin/env python3 for portability across different systems):
#!/usr/bin/python3
print("Hello, World!")
Save the file with a name, say, "runhelloWorld.py", and then assign the executable property to the file using the chmod +x command:
$ chmod +x runhelloWorld.py
Now, you can run your '.py' file as an executable script by entering:
$ ./runhelloWorld.py
Hello, World!
(Optional) Compilation exercise
To compile your code into a binary executable, you need external tools such as PyInstaller or Nuitka. In this section, we will be testing PyInstaller.
1: Install the PyInstaller package using the Pip tool, and then restart your terminal.
$ pip3 install pyinstaller
  Downloading pyinstaller-4.4-py3-none-manylinux2014_x86_64.whl (1.5 MB)
     |████████████████████████████████| 1.5 MB 83 kB/s
Collecting pyinstaller-hooks-contrib>=2020.6
  Downloading pyinstaller_hooks_contrib-2021.2-py2.py3-none-any.whl (190 kB)
     |████████████████████████████████| 190 kB 2.4 MB/s
Collecting altgraph
  Downloading altgraph-0.17-py2.py3-none-any.whl (21 kB)
Requirement already satisfied: setuptools in /usr/lib/python3/dist-packages (from pyinstaller) (52.0.0)
Installing collected packages: pyinstaller-hooks-contrib, altgraph, pyinstaller
  WARNING: The scripts pyi-archive_viewer, pyi-bindepend, pyi-grab_version, pyi-makespec, pyi-set_version and pyinstaller are installed in '/home/hawk/.local/bin' which is not on PATH.
  Consider adding this directory to PATH or, if you prefer to suppress this warning, use --no-warn-script-location.
Successfully installed altgraph-0.17 pyinstaller-4.4 pyinstaller-hooks-contrib-2021.
2: With PyInstaller ready, you can compile the previous 'helloWorld.py' file by entering;
$ python3 -m PyInstaller helloWorld.py
or (in case the path works):
$ pyinstaller helloWorld.py
32 INFO: PyInstaller: 4.4
32 INFO: Python: 3.9.5
34 INFO: Platform: Linux-5.11.0-25-generic-x86_64-with-glibc2.33
34 INFO: wrote /home/hawk/temp/test/python/helloWorld.spec
36 INFO: UPX is not available.
37 INFO: Extending PYTHONPATH with paths
['/home/hawk/temp/test/python', '/home/hawk/temp/test/python']
41 INFO: checking Analysis
41 INFO: Building Analysis because Analysis-00.toc is non existent
41 INFO: Initializing module dependency graph...
42 INFO: Caching module graph hooks...
47 INFO: Analyzing base_library.zip ...
1804 INFO: Processing pre-find module path hook distutils from '/home/hawk/.local/lib/python3.9/site-packages/PyInstaller/hooks/pre_find_module_path/hook-distutils.py'.
1804 INFO: distutils: retargeting to non-venv dir '/usr/lib/python3.9'
3770 INFO: Caching module dependency graph...
3857 INFO: running Analysis Analysis-00.toc
3880 INFO: Analyzing /home/hawk/temp/test/python/helloWorld.py
3881 INFO: Processing module hooks...
3881 INFO: Loading module hook 'hook-lib2to3.py' from '/home/hawk/.local/lib/python3.9/site-packages/PyInstaller/hooks'...
3890 INFO: Loading module hook 'hook-heapq.py' from '/home/hawk/.local/lib/python3.9/site-packages/PyInstaller/hooks'...
3892 INFO: Loading module hook 'hook-pickle.py' from '/home/hawk/.local/lib/python3.9/site-packages/PyInstaller/hooks'...
3892 INFO: Loading module hook 'hook-multiprocessing.util.py' from '/home/hawk/.local/lib/python3.9/site-packages/PyInstaller/hooks'...
3893 INFO: Loading module hook 'hook-difflib.py' from '/home/hawk/.local/lib/python3.9/site-packages/PyInstaller/hooks'...
3894 INFO: Loading module hook 'hook-sysconfig.py' from '/home/hawk/.local/lib/python3.9/site-packages/PyInstaller/hooks'...
3900 INFO: Loading module hook 'hook-distutils.util.py' from '/home/hawk/.local/lib/python3.9/site-packages/PyInstaller/hooks'...
3901 INFO: Loading module hook 'hook-encodings.py' from '/home/hawk/.local/lib/python3.9/site-packages/PyInstaller/hooks'...
3938 INFO: Loading module hook 'hook-xml.py' from '/home/hawk/.local/lib/python3.9/site-packages/PyInstaller/hooks'...
3976 INFO: Loading module hook 'hook-distutils.py' from '/home/hawk/.local/lib/python3.9/site-packages/PyInstaller/hooks'...
3976 INFO: Loading module hook 'hook-xml.etree.cElementTree.py' from '/home/hawk/.local/lib/python3.9/site-packages/PyInstaller/hooks'...
3982 INFO: Looking for ctypes DLLs
4017 INFO: Analyzing run-time hooks ...
4020 INFO: Including run-time hook '/home/hawk/.local/lib/python3.9/site-packages/PyInstaller/hooks/rthooks/pyi_rth_pkgutil.py'
4022 INFO: Including run-time hook '/home/hawk/.local/lib/python3.9/site-packages/PyInstaller/hooks/rthooks/pyi_rth_multiprocessing.py'
4024 INFO: Including run-time hook '/home/hawk/.local/lib/python3.9/site-packages/PyInstaller/hooks/rthooks/pyi_rth_inspect.py'
4029 INFO: Looking for dynamic libraries
4393 INFO: Looking for eggs
4393 INFO: Python library not in binary dependencies. Doing additional searching...
4460 INFO: Using Python library /usr/lib/x86_64-linux-gnu/libpython3.9.so.1.0
4464 INFO: Warnings written to /home/hawk/temp/test/python/build/helloWorld/warn-helloWorld.txt
4484 INFO: Graph cross-reference written to /home/hawk/temp/test/python/build/helloWorld/xref-helloWorld.html
4493 INFO: checking PYZ
4493 INFO: Building PYZ because PYZ-00.toc is non existent
4493 INFO: Building PYZ (ZlibArchive) /home/hawk/temp/test/python/build/helloWorld/PYZ-00.pyz
4773 INFO: Building PYZ (ZlibArchive) /home/hawk/temp/test/python/build/helloWorld/PYZ-00.pyz completed successfully.
4775 INFO: checking PKG
4775 INFO: Building PKG because PKG-00.toc is non existent
4775 INFO: Building PKG (CArchive) PKG-00.pkg
4801 INFO: Building PKG (CArchive) PKG-00.pkg completed successfully.
4802 INFO: Bootloader /home/hawk/.local/lib/python3.9/site-packages/PyInstaller/bootloader/Linux-64bit-intel/run
4802 INFO: checking EXE
4802 INFO: Building EXE because EXE-00.toc is non existent
4802 INFO: Building EXE from EXE-00.toc
4802 INFO: Appending archive to ELF section in EXE /home/hawk/temp/test/python/build/helloWorld/helloWorld
4812 INFO: Building EXE from EXE-00.toc completed successfully.
4813 INFO: checking COLLECT
4813 INFO: Building COLLECT because COLLECT-00.toc is non existent
4813 INFO: Building COLLECT COLLECT-00.toc
4828 INFO: Building COLLECT COLLECT-00.toc completed successfully.
The compiling will place the output under the 'dist' directory in the current work folder (To use the tree command, you need to install it by sudo apt install tree):
$ tree ./dist -L 2
./dist/
└── helloWorld
    ├── base_library.zip
    ├── helloWorld
    ├── libbz2.so.1.0
    ├── libcrypto.so.1.1
    ├── lib-dynload
    ├── libexpat.so.1
    ├── libffi.so.8
    ├── liblzma.so.5
    ├── libmpdec.so.3
    ├── libpython3.9.so.1.0
    ├── libreadline.so.8
    ├── libssl.so.1.1
    ├── libtinfo.so.6
    └── libz.so.1

2 directories, 13 files
3: In this manner, you can dispatch your compiled program to the third party with a compatible operating environment. Note that you need to include not merely the binary executable (i.e. the 'helloWorld' file) but all the files contained in the 'dist/helloWorld/' folder.
$ ./dist/helloWorld/helloWorld
Hello, World!
Be mindful, however, that the file sizes involved could be significantly larger compared to the tiny bit of the coding content (4.0K vs 15M).
$ du -hsc *
6.4M	build
15M	dist
4.0K	helloWorld.py
4.0K	helloWorld.spec
8.0K	__pycache__
4.0K	runhelloWorld.py
21M	total
Thonny, a simple IDE for Python
As you get more involved in learning or developing Python programming, you would want to employ utility software providing an "integrated" development environment. Thonny is one such IDE (Integrated Development Environment) for beginners and intermediate users alike.
You can install Thonny simply using the Pip tool:
$ pip3 install thonny
Now, start Thonny by entering from a terminal:
$ thonny &
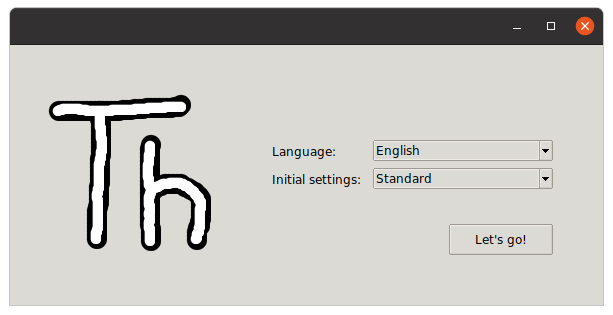
First time launch will ask you to configure the basic settings. Click Let’s go!.
The initial layout of Thonny’s GUI (Graphical User Interface) would look like this:
Let us open the previous 'helloWorld.py' file using the menu (or by pressing Ctrl+O), and then run the code by pressing F5.
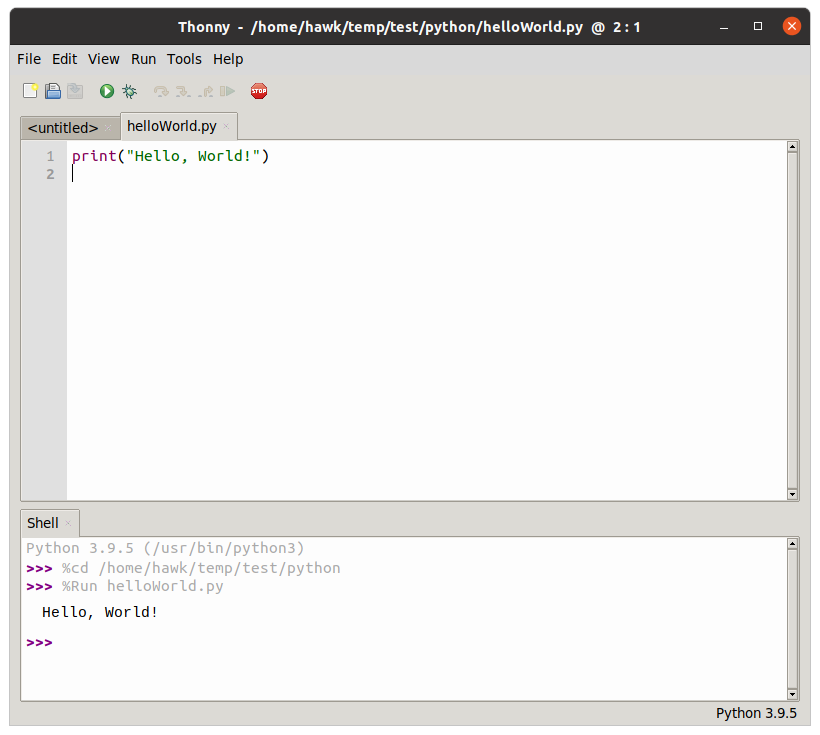
Note the greyed messages in the Shell pane show how Thonny processed the user inputs, that are:
>>> %cd /home/hawk/temp/test/python
>>> %Run helloWorld.py
Meaning, you can use the Shell area as a REPL (Read-Eval-Print Loop) console. For example, entering (Note the preceding % symbol):
%Run <file>.py
is equivalent to running the <file> from an external terminal by entering:
python3 <file>.py
To exit from Thonny, select from the menu — or by the window close button (x).
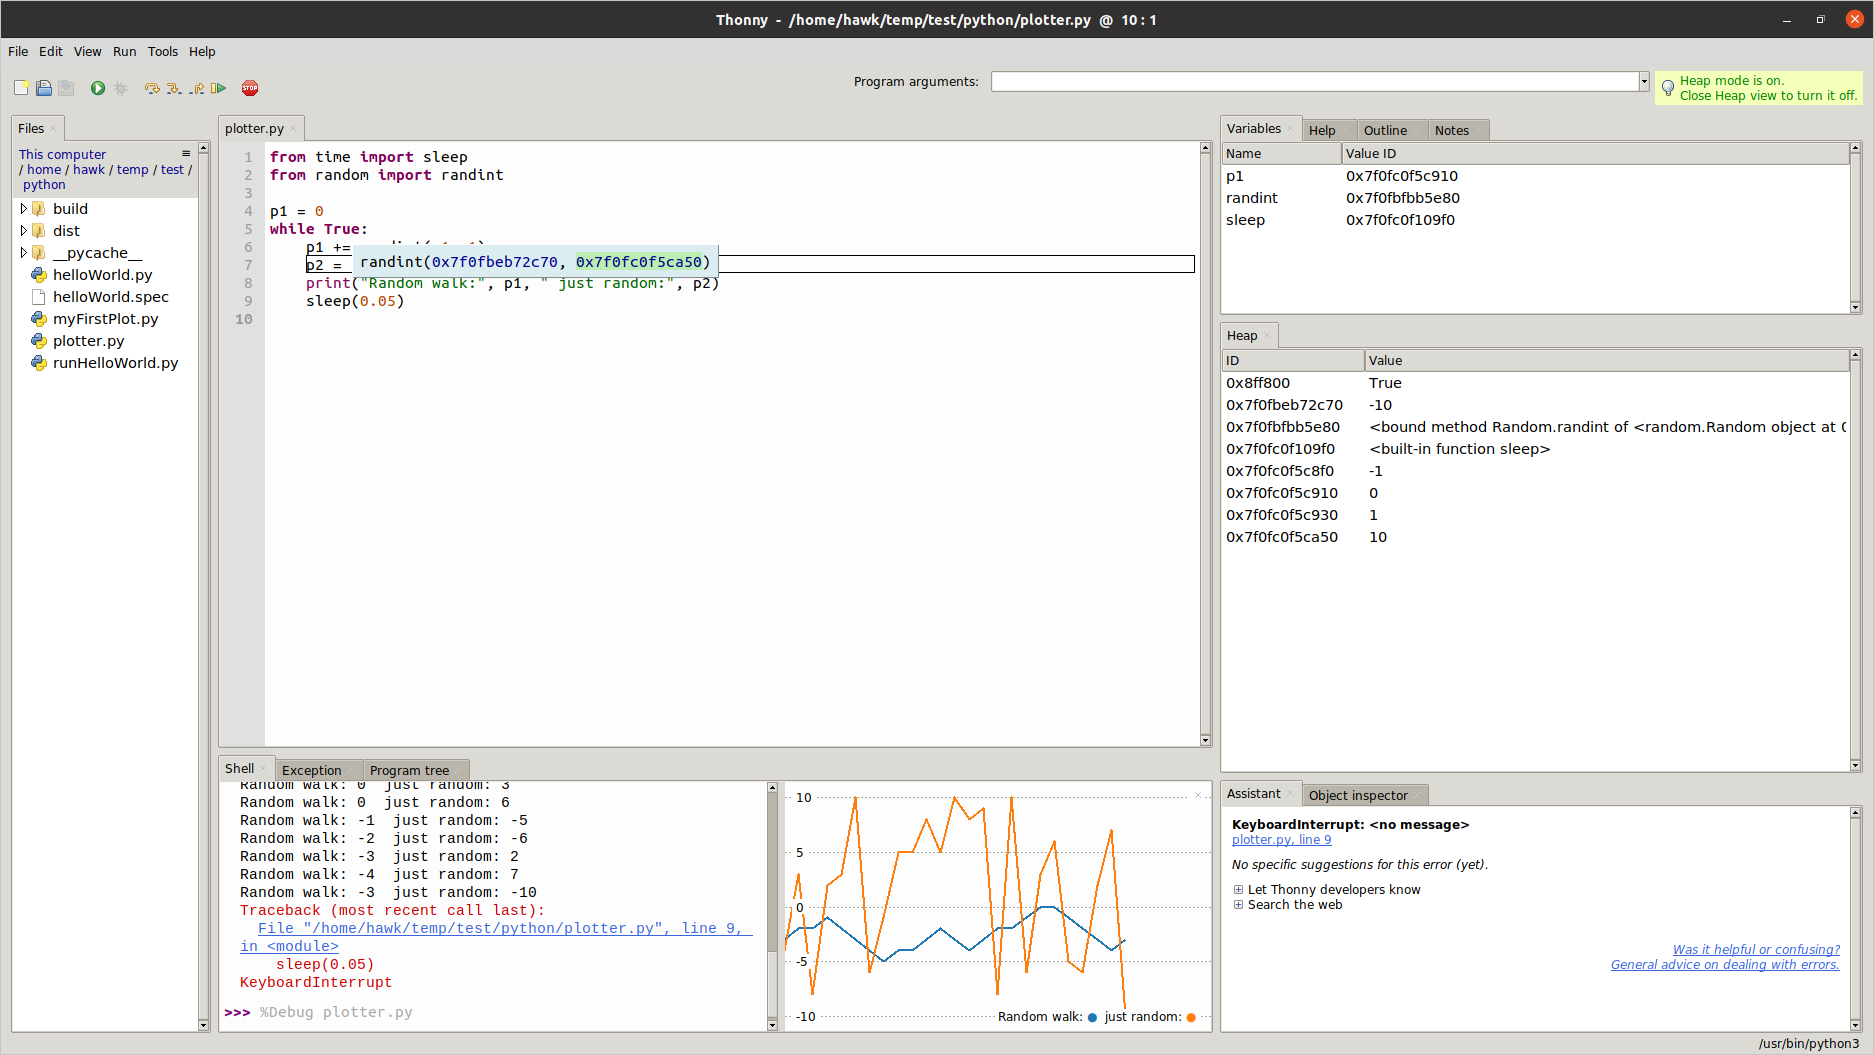
Thonny’s initial user interface is purposefully simplified so that it minimises distraction to beginners. Below is a snapshot of Thonny GUI with a further expanded layout for more advanced users.
Notes on version conflict issues for Conda environments
The Conda package manager, employed by Anaconda distributions, enables you to create virtual layers of Python workspaces built around specific Python versions (e.g. one with Python 2.7 and another with Python 3.9) or specific applications (e.g. one for TensorFlow1 and another for TensorFlow2). It is made possible by preceding the "containerised" binary paths over the others. But when it comes to non-executable Python modules (e.g. Jedi, Parso, etc.), the packages residing outside those virtual environments — i.e. the host level — take precedence.
More on missing dependencies error
One might consider installing commonly used tools in the host level — i.e. using the system Pip tool as we did in the previous sections — hoping to use them from multiple Conda environments. But when this host-level installs the same dependent packages of different versions, this scheme can cause version conflict problems from the Conda environment side.
Here is an example: When we installed Thonny, the Pip tool also grabbed several external packages necessary to run the software. These are called dependencies and are located under the '~/.local/lib/python<version>/site-packages' location.
Package                   Version
------------------------- --------
altgraph                  0.17
astroid                   2.6.5
asttokens                 2.0.5
docutils                  0.17.1
isort                     5.9.2
jedi                      0.18.0
lazy-object-proxy         1.6.0
mccabe                    0.6.1
mypy                      0.910
mypy-extensions           0.4.3
parso                     0.8.2
pyinstaller               4.4
pyinstaller-hooks-contrib 2021.2
pylint                    2.9.5
pyserial                  3.5
Send2Trash                1.7.1
thonny                    3.3.11
toml                      0.10.2
typing-extensions         3.10.0.0
wrapt                     1.12.1
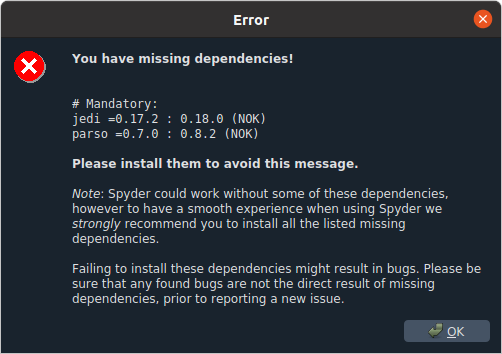
Then, you go on creating a Conda environment and installing Spyder 5.0 in it. The Conda package manager will resolve all the dependencies required to run Spyder in the virtual environment, among which there are jedi 0.17.2 and parso 0.7.0. So far so good.
Now, you try launching Spyder 5.0 inside the environment, it rather takes the jedi 0.18.0 and parso 0.8.2 modules from the user site-packages as listed above. At first sight, it doesn’t seem a big issue because the externally referenced modules are all at higher numbers, but the requirement for Spyder 5 reads: jedi =0.17.2 (not >=0.17.2) and parso =0.7.0 (not >=0.7.0), respectively. Go figure.
Unfortunately, such an incident is hardly predictable, so it would be best to keep the host-level installation via the system Pip tool at its minimum.
Containerising site installation using venv
If you do want to enjoy the best of both worlds, you may apply the "virtualisation" technique also to your site installations. It will serve as a safe test ground without having to worry about existing packages and environments — no matter whether you are using Conda environments or not.
In this section, we will clean up the previous site installations done from the host level. Then, we will redo the Thonny installation to a protected environment using Python’s venv module, a lightweight virtual environments utility.
Cleanup exercise
First of all, let us delete the two user packages we installed using the system Pip tool on the host level, namely, PyInstaller (if you have installed) and Thonny:
$ pip3 uninstall pyinstaller
$ pip3 uninstall thonny
It turned out that the Pip tool does not provide advanced cleaning functions; If you check the current status of the user site packages:
$ pip3 list --user
you can see all the dependencies remain dangled:
Package                   Version
------------------------- --------
altgraph                  0.17
astroid                   2.6.5
asttokens                 2.0.5
docutils                  0.17.1
isort                     5.9.2
jedi                      0.18.0
lazy-object-proxy         1.6.0
mccabe                    0.6.1
mypy                      0.910
mypy-extensions           0.4.3
parso                     0.8.2
pyinstaller-hooks-contrib 2021.2
pylint                    2.9.5
pyserial                  3.5
Send2Trash                1.7.1
toml                      0.10.2
typing-extensions         3.10.0.0
wrapt                     1.12.1
To clean up orphan packages, you need to enter something like this:
$ pip3 freeze | xargs pip3 uninstall -y
Now, we are back at square one (1).
$ pip3 list --user
(none)
Virtualising exercise: venv
To use venv, you first need to install the venv module (as a Ubuntu package):
$ sudo apt update && sudo apt install -y python3-venv
With the venv module ready, let us create a virtual container for the Thonny IDE.
1) The first step of using venv is preparing the container folder under your HOME directory (e.g. '~/Python/venv/Thon').
$ mkdir -p ~/Python/venv/Thon
Then, use this folder location to define your virtual environment, namely, the "Thon" environment, by entering:
$ python3 -m venv ~/Python/venv/Thon
2) Check the directory structure generated by the previous command.
$ tree ~/Python/venv/Thon/ -d -L 2
/home/hawk/Python/venv/Thon/
├── bin
├── include
├── lib
│   └── python3.9
├── lib64 -> lib
└── share
    └── python-wheels

7 directories
3) To work inside the created environment, you need to activate it. Run the 'activate' script sitting in its 'bin' folder:
$ source ~/Python/venv/Thon/bin/activate
Notice the terminal prompt has changed with the environment name tag — in this example, (Thon) — prefixed.
(Thon) hawk@solvercube:~/Desktop$
4) Now install Thonny from inside this virtual environment:
(Thon) $ pip3 install thonny (1)
| 1 | The tagged symbol (Thon) $ is prefixed to indicate that you are typing from a virtual environment. |
When the installation is complete, double-check where this "localised" operation happened:
(Thon) $ pip3 show thonny
Name: thonny
Version: 3.3.11
Summary: Python IDE for beginners
Home-page: https://thonny.org
Author: Aivar Annamaa and others
Author-email: thonny@googlegroups.com
License: MIT
Location: /home/hawk/Python/venv/Thon/lib/python3.9/site-packages
Requires: asttokens, setuptools, mypy, docutils, jedi, Send2Trash, pyserial, pylint
Required-by:
5) When yo launch Thonny:
(Thon) $ thonny &
you see that the Python interpreter is now from the virtual environment.

6) Exit from Thonny for now.
7) To exit from the venv environment, enter:
(Thon) $ deactivate
$
You can utilise such "containerised" installation as a way to share commonly used tools over multiple Conda environments. You can achieve this by first activating the venv container, followed by the Conda environment.
(spyd)(Thon) $ spyder &

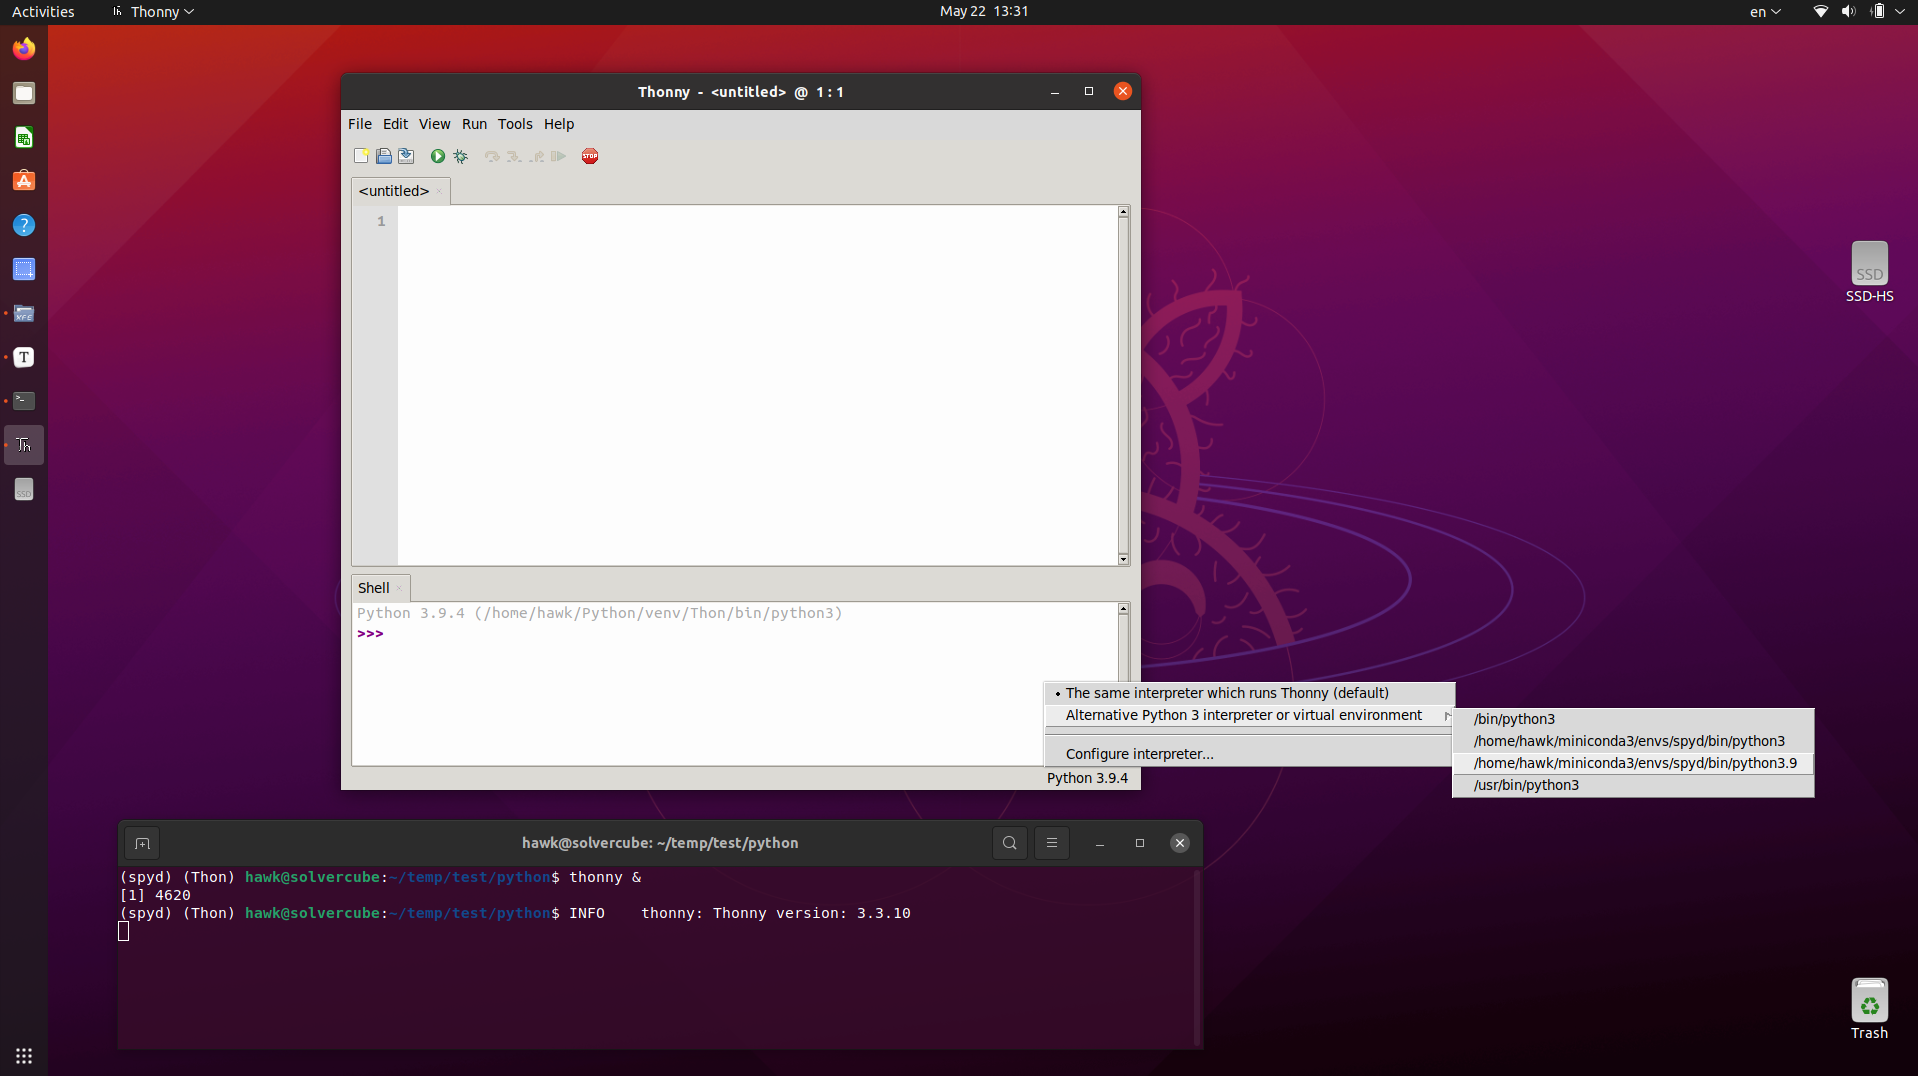
To allow Thonny to work with the Python interpreter defined by a Conda environment, you need to change the interpreter setting for Thonny, as illustrated below.
(spyd)(Thon) $ thonny &
8) If you would be using this container for some time, define an alias in your '~/.bashrc' file by referring to the below example, and then reread your '~/bashrc' configuration.
# Python ##
alias venvThon='source ~/Python/venv/Thon/bin/activate'
You can now activate this environment easily by entering venvThon.
9) Finally, you can delete any venv environments simply by removing the containing folders as in:
$ rm -r ~/Python/venv/Thon