This article provides step-by-step instructions on setting up a Ubuntu virtual environment on a personal computer running on Ubuntu 21.04 using Docker Community Edition.
The instructions given are for a Ubuntu 21.04 system, but it should also work for Ubuntu 20.04 and other Ubuntu-compatible distributions with Pop!_OS inclusive.
| The instructions given in this article may not work with your hardware. |
Setup & Initial Configuration
To use Docker, you need to set up the Docker repository. You can then install and update Docker Engine and Docker images from the repository.
1) First, update the Apt index and install prerequisite packages:
$ sudo apt update && sudo apt install -y apt-transport-https ca-certificates curl gnupg lsb-release (1)
| 1 | The prompt symbol $ indicates that you are typing at a terminal emulator (e.g. Ubuntu Terminal). |
2) The following command adds Docker’s official GPG key:
$ curl -fsSL https://download.docker.com/linux/ubuntu/gpg | sudo gpg --dearmor -o /usr/share/keyrings/docker-archive-keyring.gpg
3) Copy and paste the following command block to the terminal window:
echo \
  "deb [arch=amd64 signed-by=/usr/share/keyrings/docker-archive-keyring.gpg] https://download.docker.com/linux/ubuntu \
  $(lsb_release -cs) stable" | sudo tee /etc/apt/sources.list.d/docker.list > /dev/null
(1)| 1 | An extra blank line is intended for the last line to be parsed on pasting. |
4) Update the Apt index again and install the latest version of Docker Engine and its components:
$ sudo apt update && sudo apt install -y docker-ce docker-ce-cli containerd.io
5) Check the installation by the version:
$ docker -v
Docker version 20.10.7, build f0df350
6) Reboot.
Using Docker as a non-root user
When you containerise and run Docker applications, you have access to all the ROOT privileges by default — i.e. you log in as the root user.
To use Docker containers as a non-root user, add your $USER to the docker group:
$ sudo usermod -aG docker $USER
and reboot.
If there is no docker group in your system, create one by sudo groupadd docker.
|
(Optional) "Hello, World!" from Docker
This section is intended for anyone new to the Docker technology and introduces the basic commands for managing Docker images and Docker containers.
To learn how a Docker application operates, try running the following command and observe the output:
$ docker run hello-world
Unable to find image 'hello-world:latest' locally
latest: Pulling from library/hello-world
b8dfde127a29: Pull complete
Digest: sha256:df5f5184104426b65967e016ff2ac0bfcd44ad7899ca3bbcf8e44e4461491a9e
Status: Downloaded newer image for hello-world:latest

Hello from Docker!
This message shows that your installation appears to be working correctly.

To generate this message, Docker took the following steps:
 1. The Docker client contacted the Docker daemon.
 2. The Docker daemon pulled the "hello-world" image from the Docker Hub.
    (amd64)
 3. The Docker daemon created a new container from that image which runs the
    executable that produces the output you are currently reading.
 4. The Docker daemon streamed that output to the Docker client, which sent it
    to your terminal.

To try something more ambitious, you can run an Ubuntu container with:
 $ docker run -it ubuntu bash

Share images, automate workflows, and more with a free Docker ID:
 https://hub.docker.com/

For more examples and ideas, visit:
 https://docs.docker.com/get-started/
You may get puzzled by the output message, but don’t worry and run it once more:
$ docker run hello-world
Hello from Docker!
This message shows that your installation appears to be working correctly.

To generate this message, Docker took the following steps:
 1. The Docker client contacted the Docker daemon.
 2. The Docker daemon pulled the "hello-world" image from the Docker Hub.
    (amd64)
 3. The Docker daemon created a new container from that image which runs the
    executable that produces the output you are currently reading.
 4. The Docker daemon streamed that output to the Docker client, which sent it
    to your terminal.

To try something more ambitious, you can run an Ubuntu container with:
 $ docker run -it ubuntu bash

Share images, automate workflows, and more with a free Docker ID:
 https://hub.docker.com/

For more examples and ideas, visit:
 https://docs.docker.com/get-started/
In the above example, you cast a command to run a Docker application, namely, 'hello-world', using docker run. The Docker Engine checks if you have the Docker image for the corresponding executable in your local storage, and because there is none, it pulls (i.e. downloads) the best-matching one from the online repository. Then, Docker creates a virtualisation layer call a container by resembling the environment setting from the image and loads the program executable within this container.
Afterwards, when you ran the same command for the second time, Docker instantiated the application via another container; this time, directly created from your local image.
You can check the Docker image that is pulled to your local storage by docker image ls:
$ docker image ls
REPOSITORY    TAG       IMAGE ID       CREATED        SIZE
hello-world   latest    d1165f221234   4 months ago   13.3kB
To list the currently running containers (if any), use the command docker container ls:
$ docker container ls
(none)
There is none because each of the two (2) containers was closed (or "exited") on fulfilling its purpose. You can use the docker container ls -a command to list all the containers with exited ones inclusive:
$ docker container ls -a
CONTAINER ID   IMAGE         COMMAND    CREATED          STATUS                      PORTS     NAMES
ec66fb66e110   hello-world   "/hello"   17 minutes ago   Exited (0) 17 minutes ago             hungry_kare
5b94d180932b   hello-world   "/hello"   18 minutes ago   Exited (0) 18 minutes ago             flamboyant_beaver
The above output shows the ID for each container, where it came from (i.e. the IMAGE column), the current status, and so on. Interestingly enough, each container has a cute name randomly assigned by the Docker Engine.
If you try deleting the 'hello-world' image at this point, it will issue an error message. It implies that the image remains referenced by your container(s) — even with the "exited" status.
$ docker image rm hello-world
Error response from daemon: conflict: unable to remove repository reference "hello-world" (must force) - container 5b94d180932b is using its referenced image d1165f221234
You first need to remove the stopped containers using docker container rm <container-ID’s> — here, the ones with ID’s ec66fb66e110 and 5b94d180932b — which still reference the image we want to delete:
$ docker container rm ec66fb66e110 5b94d180932b
ec66fb66e110
5b94d180932b
The command docker prune removes all exited containers simultaneously. That said, use it with caution.
|
Now you can delete the target image using docker image rm:
$ docker image rm hello-world
Untagged: hello-world:latest
Untagged: hello-world@sha256:df5f5184104426b65967e016ff2ac0bfcd44ad7899ca3bbcf8e44e4461491a9e
Deleted: sha256:d1165f2212346b2bab48cb01c1e39ee8ad1be46b87873d9ca7a4e434980a7726
Deleted: sha256:f22b99068db93900abe17f7f5e09ec775c2826ecfe9db961fea68293744144bd
$ docker image ls
REPOSITORY TAG IMAGE ID CREATED SIZE
Nvidia Container Toolkit
The Nvidia Container Toolkit (formerly, Nvidia Docker) allows users to utilise GPU accelerated containers with the installed Nvidia graphics hardware (and with the latest driver). The broad meaning of the toolkit is not a single product but a hierarchy of components of varying dependencies. For a detailed architecture overview, please refer to https://docs.nvidia.com/datacenter/cloud-native/container-toolkit/arch-overview.html#arch-overview.
Here, I choose the nvidia-container-toolkit component from the hierarchy as it gives me no dependency issue on the computing hardware I tested with the Ubuntu and Pop!_OS operating systems.
Installing nvidia-container-toolkit
For Ubuntu 20.04, you can extract the distro ID by entering:
$ distribution=$(. /etc/os-release;echo $ID$VERSION_ID)
$ echo $distribution
ubuntu20.04
For Ubuntu 21.04 or Pop!_OS (20.04/21.04) — which is not in the Supported Platforms but of compatible operating systems, I could trick it as if it were Ubuntu 20.04:
$ distribution=ubuntu20.04
To add the stable repository and GPG key, copy and paste the following command block to the terminal window:
curl -s -L https://nvidia.github.io/nvidia-docker/gpgkey | sudo apt-key add - \
   && curl -s -L https://nvidia.github.io/nvidia-docker/$distribution/nvidia-docker.list | sudo tee /etc/apt/sources.list.d/nvidia-docker.list
(1)| 1 | The extra blank line is intended for the last line to be parsed on pasting. |
Warning: apt-key is deprecated. Manage keyring files in trusted.gpg.d instead (see apt-key(8)).
OK
deb https://nvidia.github.io/libnvidia-container/stable/ubuntu18.04/$(ARCH) /
#deb https://nvidia.github.io/libnvidia-container/experimental/ubuntu18.04/$(ARCH) /
deb https://nvidia.github.io/nvidia-container-runtime/stable/ubuntu18.04/$(ARCH) /
#deb https://nvidia.github.io/nvidia-container-runtime/experimental/ubuntu18.04/$(ARCH) /
deb https://nvidia.github.io/nvidia-docker/ubuntu18.04/$(ARCH) /
Refresh the Apt index and install the nvidia-container-toolkit component:
$ sudo apt update && sudo apt install -y nvidia-container-toolkit
and restart Docker daemon:
$ sudo systemctl restart docker
nvidia/cudagl base image
Check the latest nvidia/cudagl images for Ubuntu 20.04 from the Docker hub (https://hub.docker.com/r/nvidia/cudagl):
We are going to use the nvidia/cudagl:11.4.0-base image. Pull and run nvidia-smi off the target image by entering:
$ docker run --gpus all nvidia/cudagl:11.4.0-base nvidia-smi
  :
Status: Downloaded newer image for nvidia/cudagl:11.4.0-base
Wed Jul 21 21:22:55 2021
+-----------------------------------------------------------------------------+
| NVIDIA-SMI 470.57.02    Driver Version: 470.57.02    CUDA Version: 11.4     |
|-------------------------------+----------------------+----------------------+
| GPU  Name        Persistence-M| Bus-Id        Disp.A | Volatile Uncorr. ECC |
| Fan  Temp  Perf  Pwr:Usage/Cap|         Memory-Usage | GPU-Util  Compute M. |
|                               |                      |               MIG M. |
|===============================+======================+======================|
|   0  NVIDIA GeForce ...  On   | 00000000:3B:00.0 Off |                  N/A |
| N/A   55C    P0    N/A /  N/A |    392MiB /  4042MiB |      4%      Default |
|                               |                      |                  N/A |
+-------------------------------+----------------------+----------------------+

+-----------------------------------------------------------------------------+
| Processes:                                                                  |
|  GPU   GI   CI        PID   Type   Process name                  GPU Memory |
|        ID   ID                                                   Usage      |
|=============================================================================|
+-----------------------------------------------------------------------------+
The previous step consequently pulled the nvidia/cudagl:11.4.0-base image to my local storage:
$ docker image ls
REPOSITORY      TAG           IMAGE ID       CREATED       SIZE
nvidia/cudagl   11.4.0-base   a32fe39a6594   13 days ago   459MB
Dockerfile for nvidia-hawk image
Create a plain text file named "Dockerfile" from a local work folder:
$ mkdir ~/temp && cd ~/temp
$ touch Dockerfile
with the following content:
FROM nvidia/cudagl:11.4.0-base
ENV user hawk
RUN useradd -m -d /home/${user} ${user} \
  && chown -R ${user} /home/${user}
RUN apt update && apt install -y sudo
RUN adduser ${user} sudo
RUN echo '%sudo ALL=(ALL) NOPASSWD:ALL' >> /etc/sudoers
USER ${user}
CMD ["bin/bash"]
With the Dockerfile scripting ready, build it to an image named "nvidia-hawk" (Ignore some warning messages regarding the apt command):
$ docker build -t nvidia-hawk .
Check the built image:
$ docker image ls
REPOSITORY      TAG           IMAGE ID       CREATED         SIZE
nvidia-hawk     latest        6f7f744b69e4   7 seconds ago   508MB
nvidia/cudagl   11.4.0-base   a32fe39a6594   13 days ago     459MB
Launching scripts for the nvidia-hawk image
Now, we will create a launching script for the nvidia-hawk image to work with a shared work folder (e.g. '~/sf'). Let us call the resultant container "nvidiahawksf".
Copy and paste the following command block to the terminal:
echo 'docker run --gpus all -e NVIDIA_DRIVER_CAPABILITIES=all -it -v /home/hawk/sf:/home/hawk/sf -v /tmp/.X11-unix:/tmp/.X11-unix -e DISPLAY -e XAUTHORITY --name hawksfcon nvidia-hawk
' > runhawksfcon
Here’s another script, 'reshawksfcon', for resuming from an exited nvidiahawksf container:
echo 'docker start hawksfcon
docker attach hawksfcon
' > reshawksfcon
Prepare a folder to store custom scripts:
$ mkdir ~/scripts
After making both scripts "executable", move them to your '~/scripts/' folder:
$ chmod +x runhawksfcon
$ chmod +x reshawksfcon
$ mv {runhawksfcon,reshawksfcon} ~/scripts/
Now, add the following content to your '~/.bashrc' file:
# Path to hawk's custom scripts ##
export PATH=/home/hawk/scripts:${PATH}
and reread the '~/.bashrc' configuration using the source command:
$ source ~.bashrc
You may now test-run the launching script after pruning any exited containers:
$ docker container prune
$ runhawksfcon
To run a command as administrator (user "root"), use "sudo <command>".
See "man sudo_root" for details.

hawk@75663960092e:/$
-
Note the change of your terminal prompt as you log in to your container.
-
Type
exitto leave the container.
Also, test-run the script for resuming:
$ reshawksfcon
hawksfcon
hawk@75663960092e:/$
-
Type
exitto leave the container.
All tests passed! Let us clean up all the stopped containers for now.
$ docker container prune
(Optional) Glmark2 test
Let us try performing a graphics performance test using the Glmark2 package.
Start our nvidiahawksf container, and install the Glmark2 package:
$ runhawksfcon
hawk@41201539bd43:/$ sudo apt install -y glmark2
and run the test by entering glmark2:
hawk@41201539bd43:/$ glmark2
The test will open up a rendering window with various 3D objects. Note the full benchmark test will take several minutes to finish.
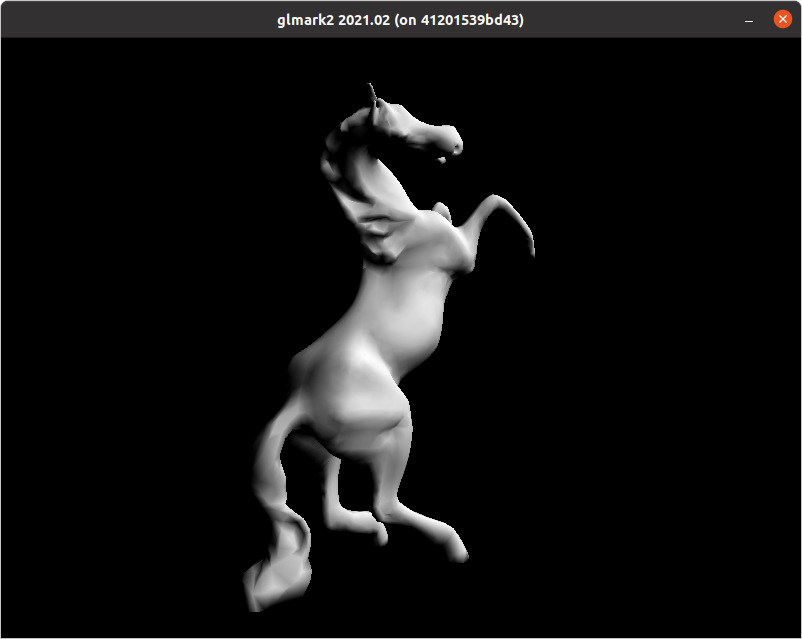
Unfortunately, the program implementation does not go well with the recent Nvidia graphics driver updates.
  :
[ideas] speed=duration: FPS: 5460 FrameTime: 0.183 ms
[jellyfish] <default>: FPS: 5115 FrameTime: 0.196 ms
Error: Failed to add fragment shader from file None:
Error:   0(26) : warning C7022: unrecognized profile specifier "highp"
Error: 0(26) : error C0502: syntax error at token "highp"
Error:
Error: Failed to add fragment shader from file None:
Error:   0(75) : warning C7022: unrecognized profile specifier "highp"
Error: 0(75) : error C0502: syntax error at token "highp"
Error:
[terrain] <default>:Segmentation fault (core dumped)
| It was sufficient to see several 3D graphics displaying from inside a Docker container because glmark2 is a benchmark implementation for OpenGL 2.0 and ES 2.0, which I guess started being phase out since recently. |
Post-installation Actions
(Optional) Extra packages for Docker containers
Start a docker container and install the SciTE package:
hawk@136e9a3fb7d0:/$ sudo apt install scite
You may need to install the missing packages:
hawk@136e9a3fb7d0:/$ sudo apt install libcanberra-gtk3-module
Also, add the following to your '~/.bashrc' to shadow some warning message:
# SciTE for Docker containers ##
export NO_AT_BRIDGE=1
and reread the '~/.bashrc' configuration.
Install extra packages for Docker containers:
hawk@136e9a3fb7d0:/$ sudo apt install build-essential openmpi-bin freeglut3-dev libx11-dev libxmu-dev libxi-dev libglu1-mesa libglu1-mesa-dev
Also, install the Nano editor in case the graphical text editor (i.e. SciTE) crashes in a container:
hawk@136e9a3fb7d0:/$ sudo apt install nano
(Optional) Extra variables for Docker containers
To define the USER variable inside a container clearly, you may add the following lines to your '~/.bashrc' file:
# Extra settings for Docker containers ##
export USER=$user
export LOGNAME=$user
Here is a setting and aliases for the Open MPI executables:
# Open MPI ##
export OMPI_MCA_btl_vader_single_copy_mechanism=none
alias mpirun='mpirun --use-hwthread-cpus'
alias mpiexec='mpiexec --use-hwthread-cpus'
Committing the changes back to your image
After performing some actions from a container, you would want to keep the changes remembered:
$ docker commit hawksfcon nvidia-hawk
sha256:e5cbe34ef2c158ef0cca9c27818a2b095a71f17712e70466e03f46ec4323d846
The following is another script for performing the commit task:
echo 'docker commit hawksfcon nvidia-hawk
docker image ls
' > commit_hawksfcon
chmod +x commit_hawksfcon
mv commit_hawksfcon ~/scripts/
(1)
| 1 | An extra blank line is intended for the last line to be parsed on pasting. |
Now you can safely vaporise the stopped container because we updated the reference image with the changes made during the container use.
$ docker container rm hawksfcon