This article provides step-by-step instructions on installing Ubuntu 21.04 Desktop on a personal computer running on Microsoft Windows 10 using Oracle VM VirtualBox.
The instructions given should work for Windows 10 Home and Windows 10 Pro with both laptops and desktops inclusive.
Preparation
1: Install Oracle VM VirtualBox referring to the latest VirtualBox installation tutorial from Solvercube LearnPress (no registration required for free articles).
2: Get the latest Ubuntu Desktop 21.04 ISO image from https://ubuntu.com/#download.
Setup & Initial Configuration
1: Virtual machine preparation
1.1: Launch Oracle VM VirtualBox Manager to create an empty virtual disk:
-
From the VirtualBox Manager menu, select
-
Select
Linuxin theTypelist box. -
Select
Ubuntu (64-bit)in theVersionlist box. -
Type
Ubuntu 21.04in theNameedit box. -
Set your desired machine folder location (e.g. 'S:\mf'`).
-
Click
Nextto proceed.

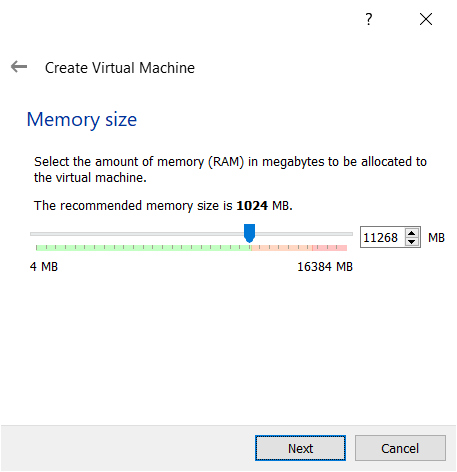
1.2: Move the slider control — for example, to the end of the green bar — to set the memory size for the virtual machine. Click Next.
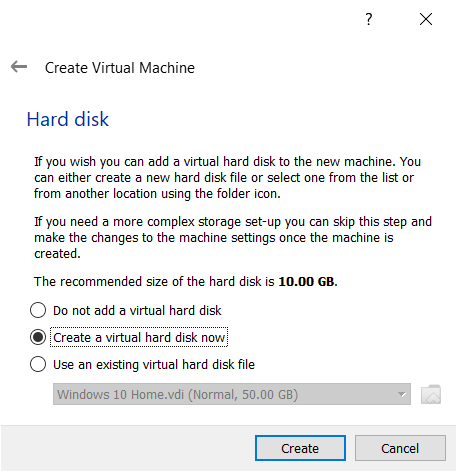
1.3: Keep the default selection of Create a virtual hard disk now, and click Create.
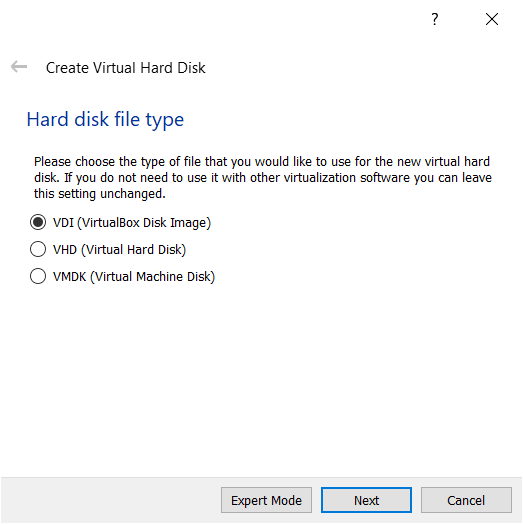
1.4: Keep the default choice of VDI (VirtualBox Disk Image), and click Next.
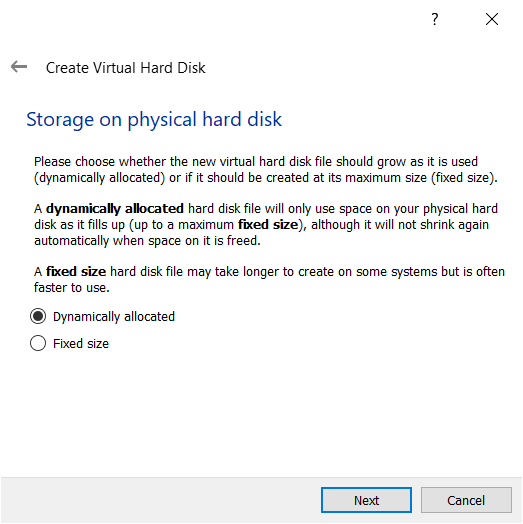
1.5: Choose Dynamically allocated for the size of the virtual hard disk. Click Next.
1.6: A standard installation of Ubuntu 21.04 takes about 9.5 GB of disk space. Adjust the size limit to around 40.00 GB, and then click Create.
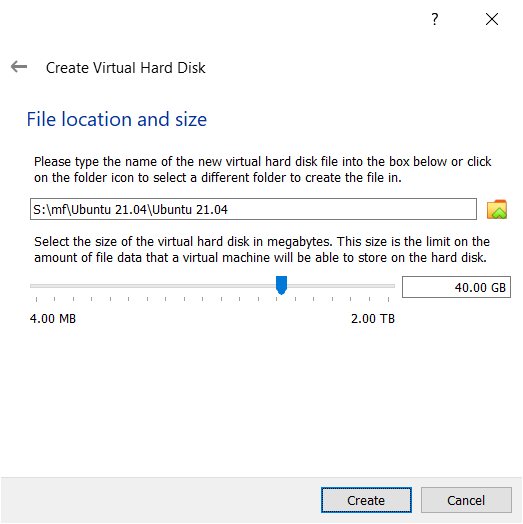
| Together with the previous option, your virtual disk will dynamically grow up to, in this case, 40 GB from initially a smaller size (of about 11 GB). You can alter this size limit later if necessary. |
2: Starting Ubuntu partition
2.1: Mount the Ubuntu ISO image to your DVD drive (e.g. 'D:'), and then click  (
(Start) to turn on the virtual machine — which is empty at the moment.
2.2: Make sure your start-up disk is correct (e.g. Host Drive 'D:'), and then click Start.

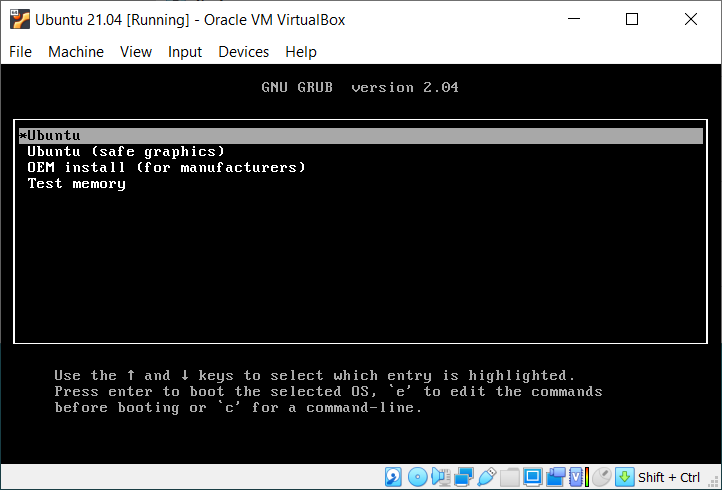
2.3: Select Ubuntu from the virtual machine’s Grub menu. Press Enter.
If you set up a virtual machine for the first time, two message bars on the Auto capture keyboard and mouse point integration will appear.


These notify your mouse click from inside the virtual machine window will automatically grab your mouse input — i.e. temporarily off from the host operating system. To release the "captured" keyboard/mouse input back to the host operating system, you need to press the Host-key combination. Your current Host-key definition is showing in the right corner of the bottom status bar.
That said, this capturing and releasing of the keyboard/mouse operation will be automatically done after installing the Guest Additions module — i.e. without having to release it manually. You can eliminate these bars from appearing by clicking  (
(Do not show this message again).
3: Initial configuration
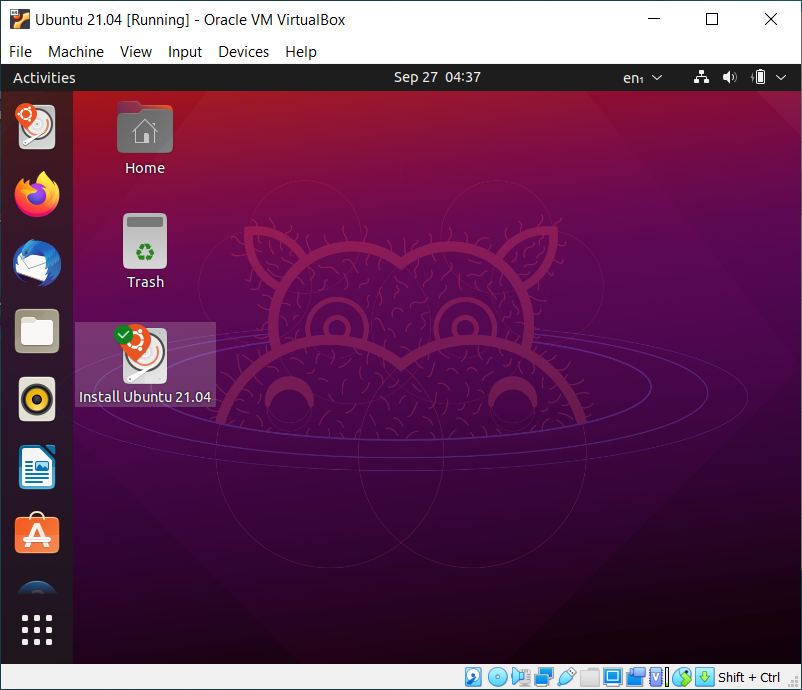
3.1: Welcome! Click Try Ubuntu.

3.2: Double-click the Install Ubuntu 21.04 icon from the Desktop area.
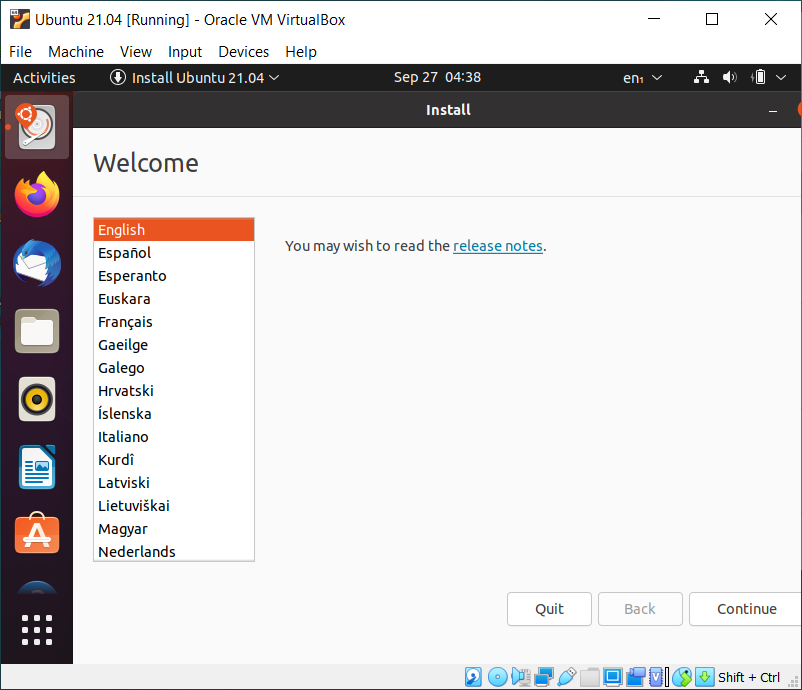
3.3: Choose your language and click Continue.
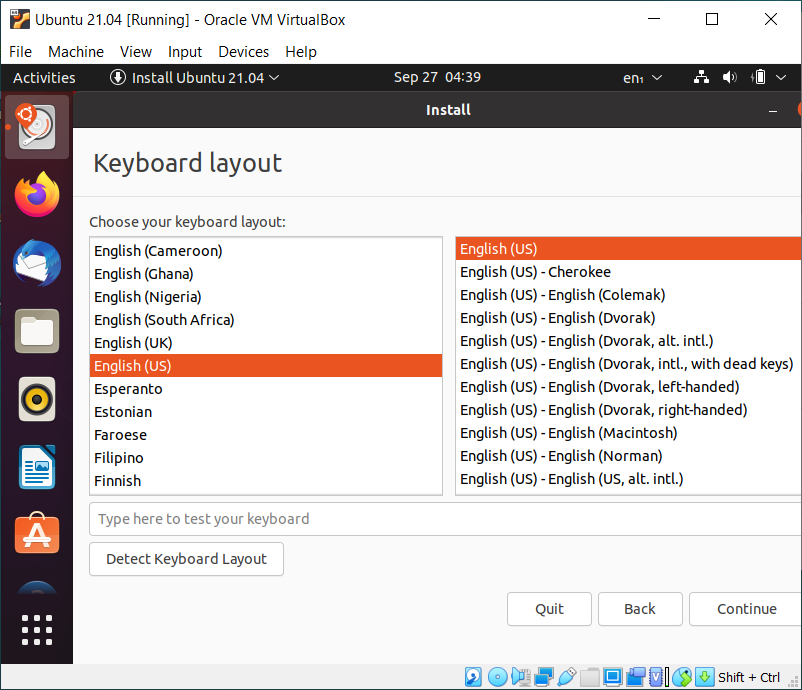
3.4: Choose the keyboard layout applicable to your system, and click Continue.
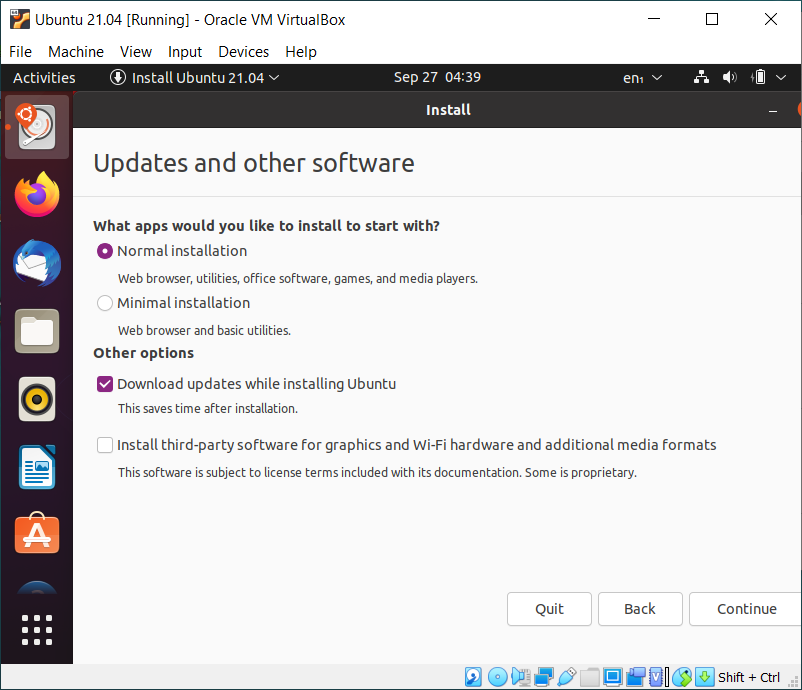
3.4: Keep the default option of Normal installation, and click Continue.
3.6: Keep the installation type of Erase disk and install Ubuntu. Click Install Now.
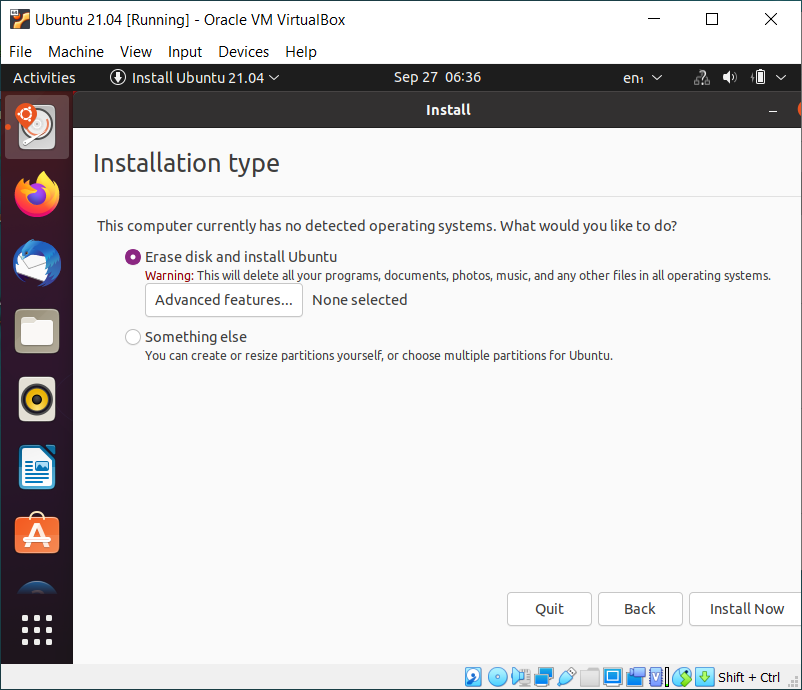
The first option is safe because the current installation is to an empty virtual disk. But when you install Ubuntu to a physical disk, especially with another operating system (e.g. for dual booting), you will HAVE TO choose Something else to configure a physical partition and boot partition correctly.
|
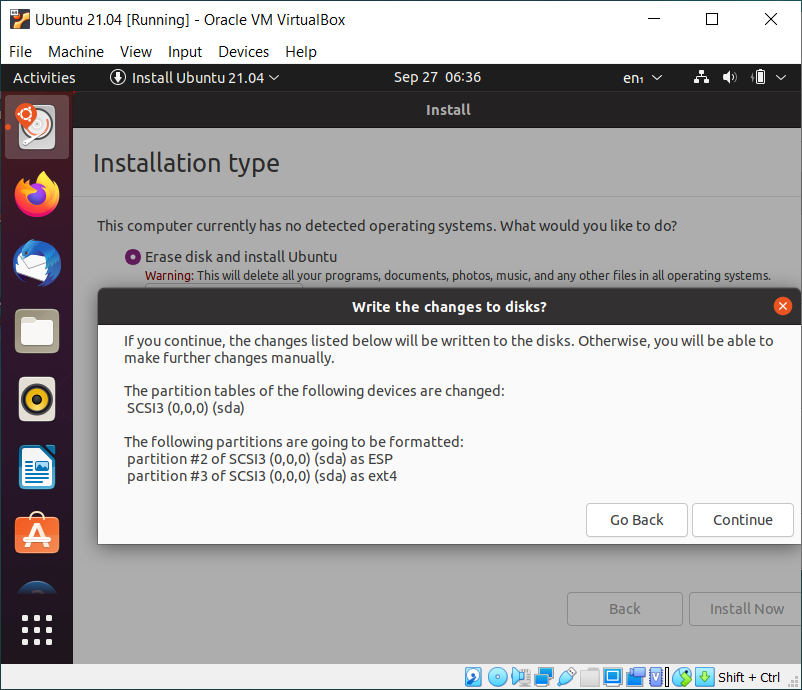
3.7: Click Continue to confirm writing the changes to the virtual disk.
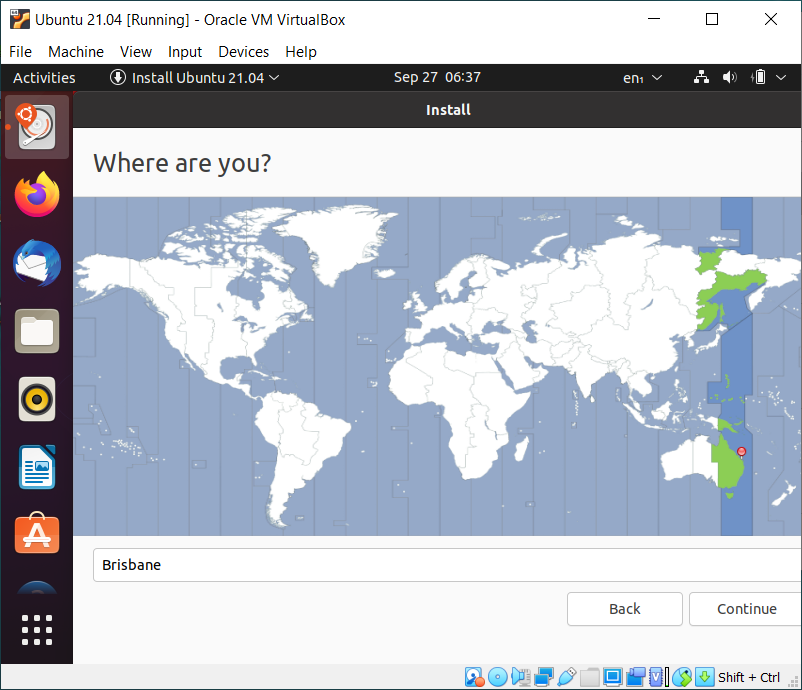
3.8: Tell the installer where you are, and then click Continue.
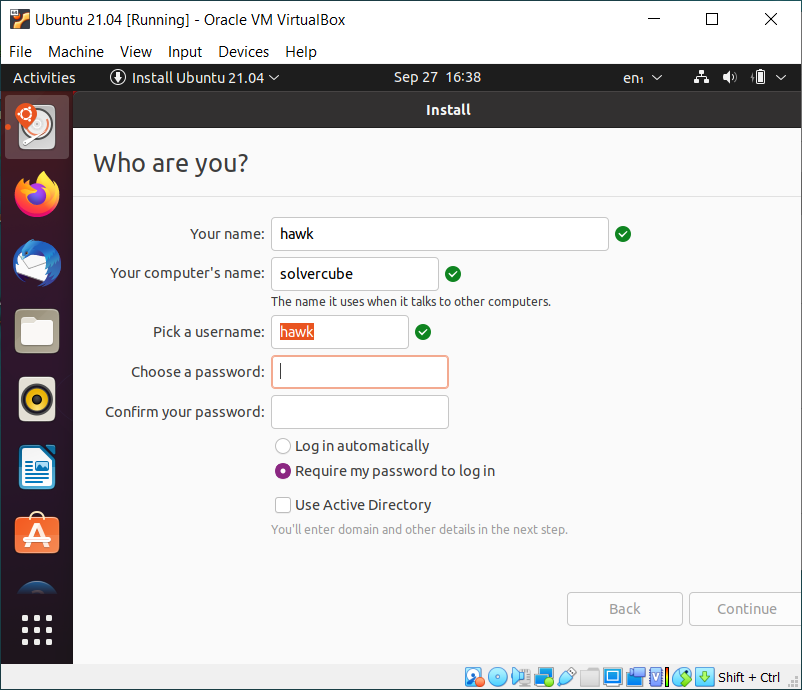
3.9: Enter a name for your logging into your Ubuntu system. Also, set a password for administrative tasks. Click Continue when done.
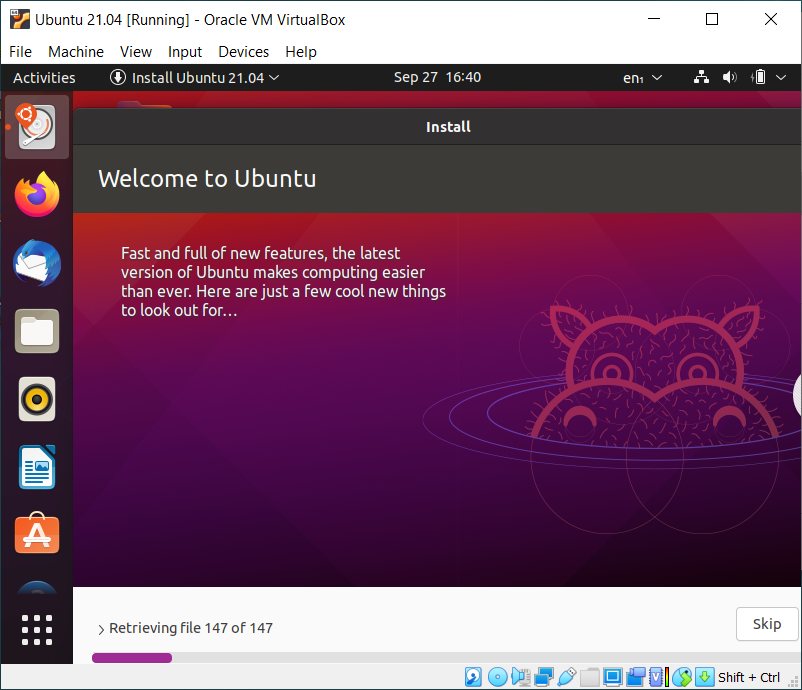
3.10: Copying files will proceed with a progress bar displaying at the bottom of the screen.
| You better not maximise nor resize the virtual machine window until you install the Guest Additions module. Doing so may make the virtual graphics unstable (e.g. black screen). |
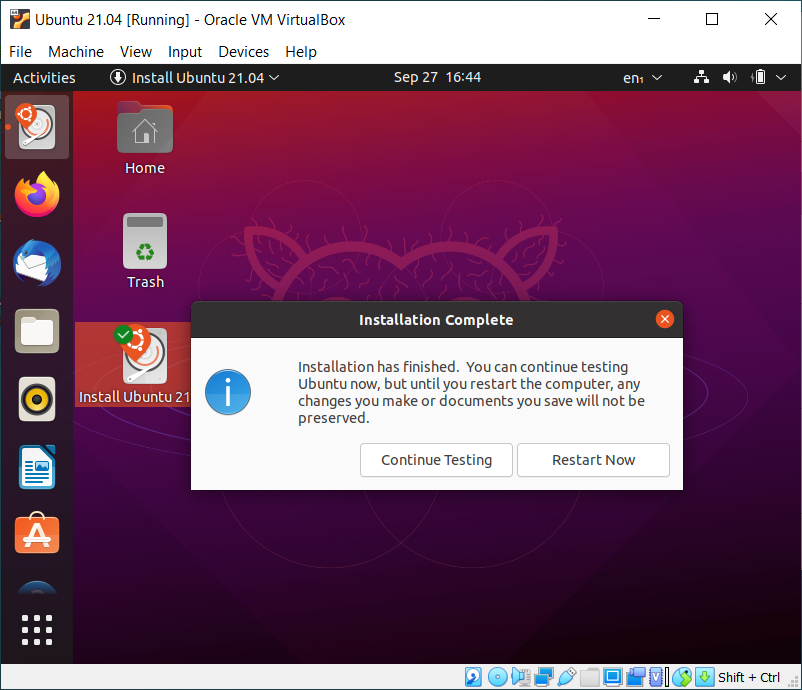
3.11: On getting the Installation Complete dialog window, click Restart Now.
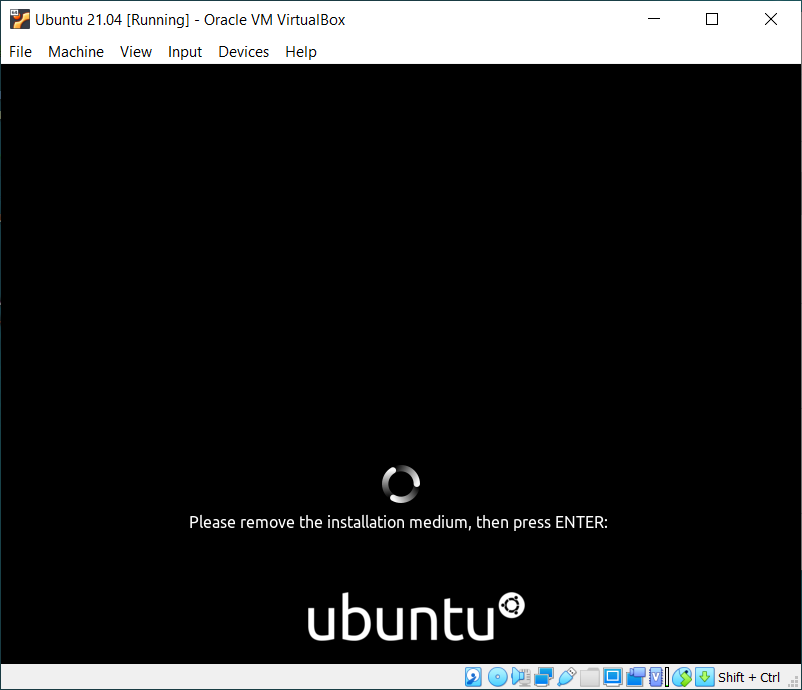
3.12: Windows operating system will eject the installation media automatically. Press Enter to proceed.
4: First-time logging in
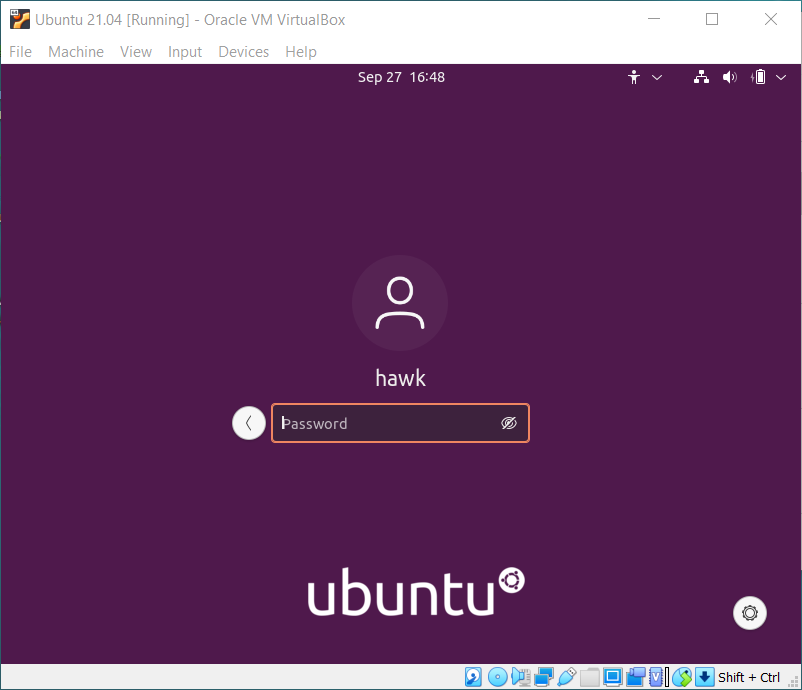
4.1: On the restart, click — or press Enter — from the login screen, type in your set password, and then press Enter again.
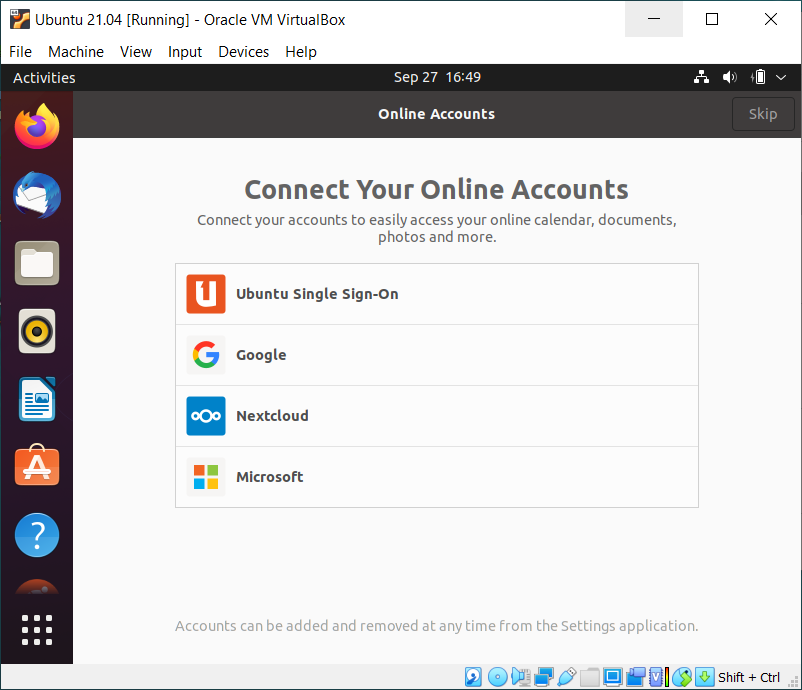
4.2: Click Skip for now from the Online Accounts page. Turn each page by clicking Next, until Done; Some will ask your permission or participation.
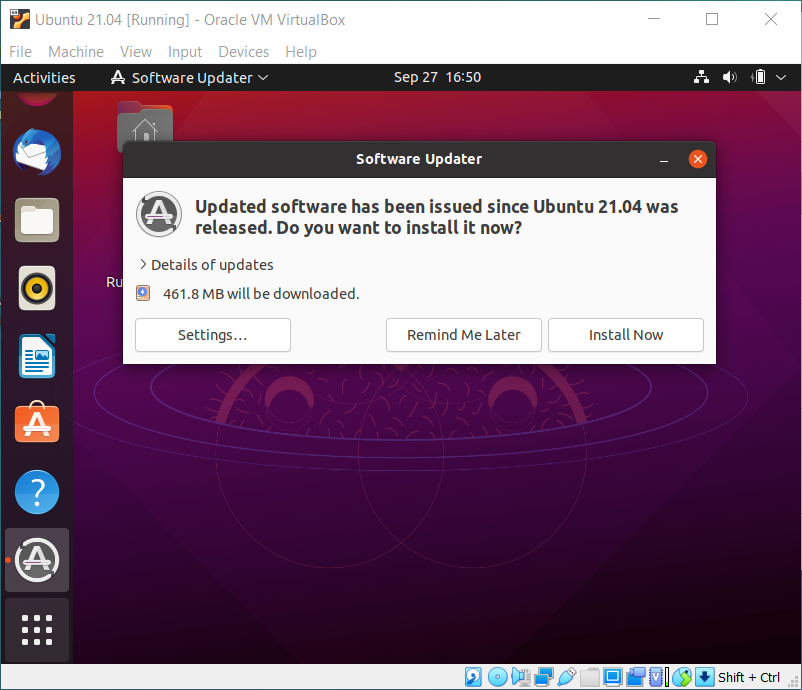
4.3: In case there are updated packages, Software Updater will show up for your action. Click Install Now.
4.4: Click the  (Software Updater) icon from Taskbar if the progress dialog is not showing.

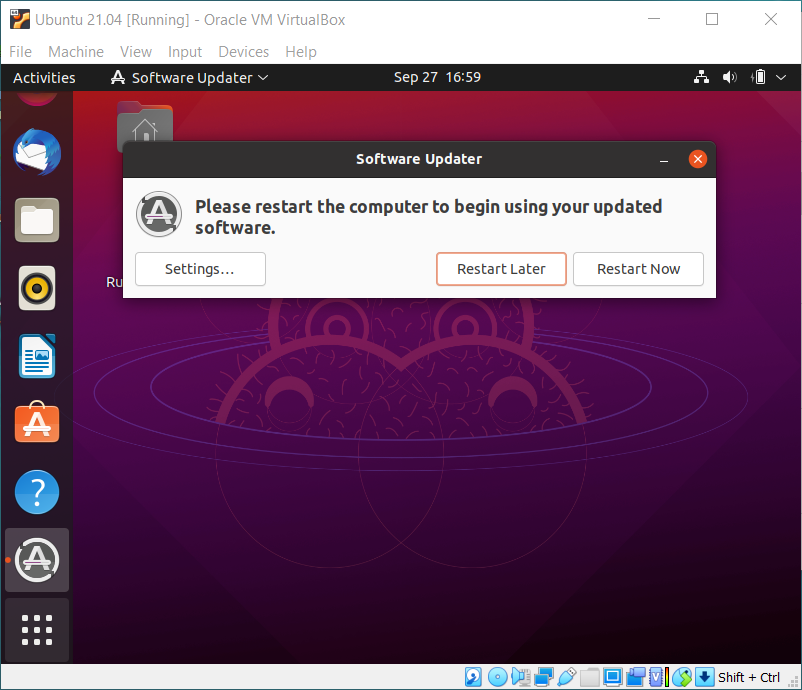
4.5: If for critical updates, you may have to restart the virtual machine. Click Restart Now.
Guest Additions Module
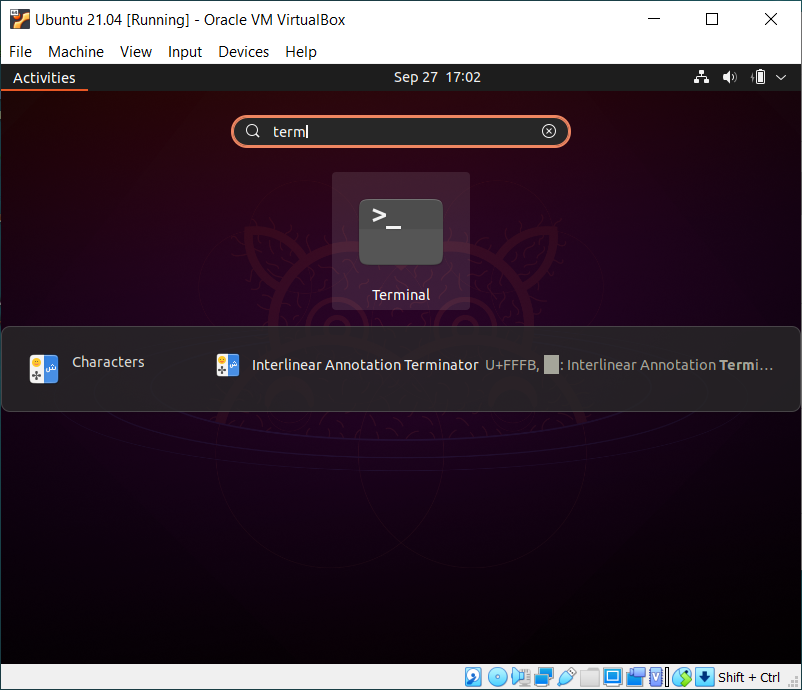
Click the Show Applications icon in the bottom left corner to launch Ubuntu Search.
Type a few first characters of the word "terminal" and click — or press Enter — as soon as it picks up the Terminal application.
In the Ubuntu Terminal, enter the following commands one by one:
$ sudo apt update
$ sudo apt upgrade -y
$ sudo apt install -y build-essential
$ sudo apt install -y module-assistant
$ sudo m-a prepare
If you receive a Resource temporarily unavailable message while trying to update, wait until the background Software Updater finishes its operation, and then start over.
|
From the virtual machine menu — i.e. the one under the Ubuntu 21.04 [running] - Oracle VM VirtualBox window — select
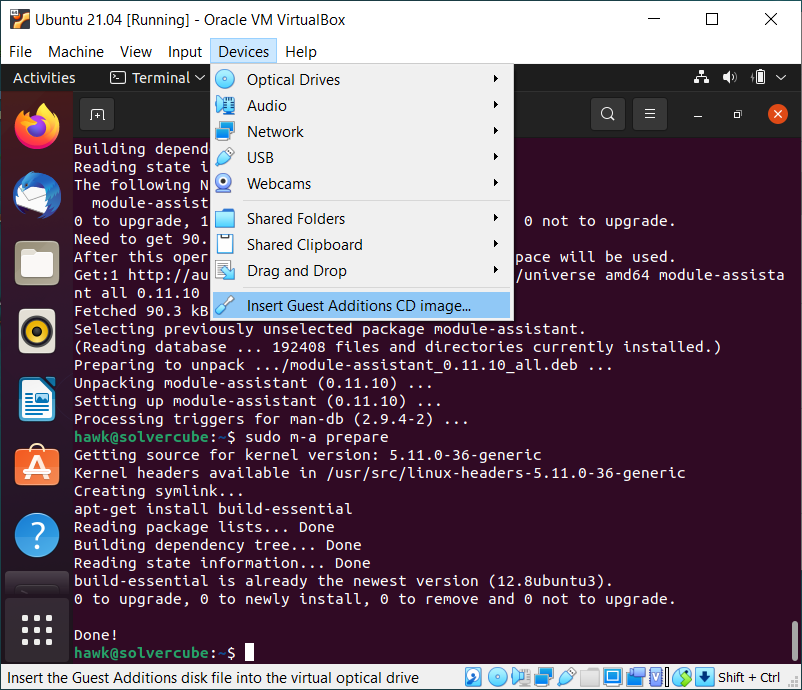
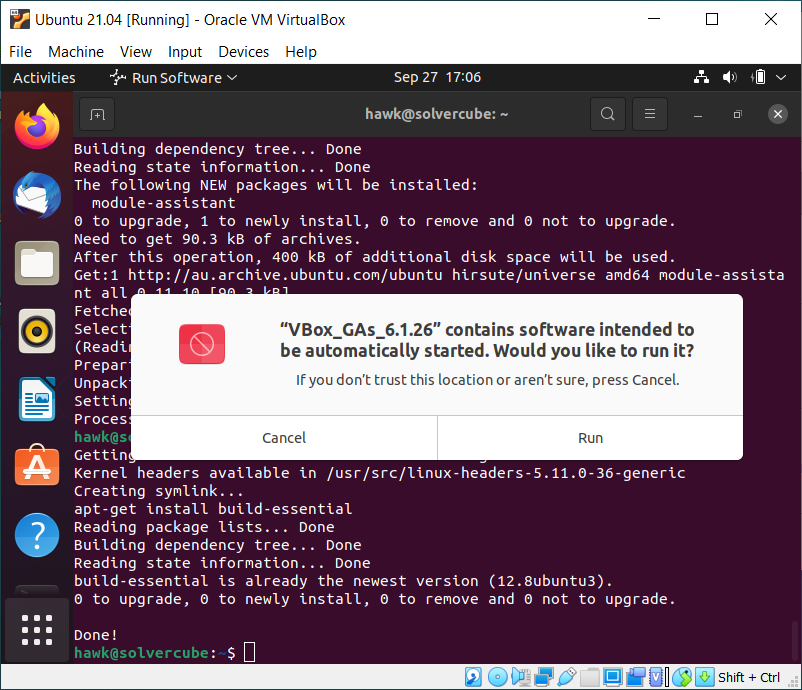
Click Run. It will spawn another terminal showing the installation process.
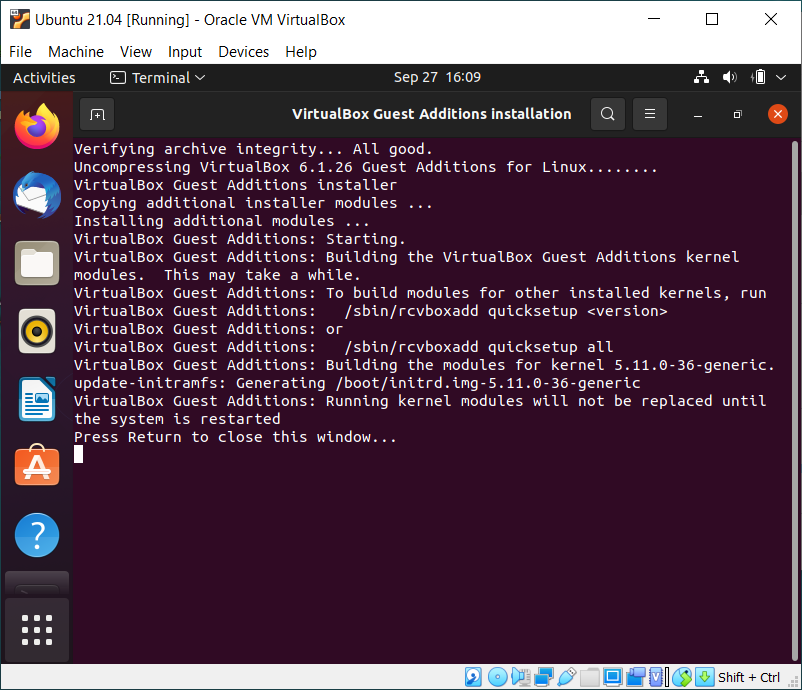
On getting the Press Return to close this window… message, press Enter. It will close the current terminal window.
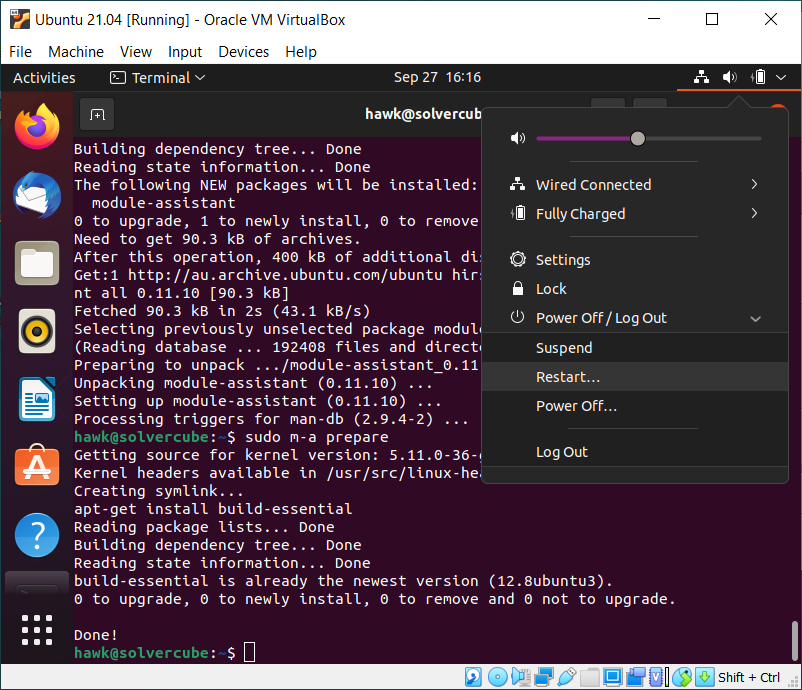
Restart your virtual machine by clicking the small triangle in the top right corner and selecting Power Off/Log Out then Restart… Click Restart on the following dialog.
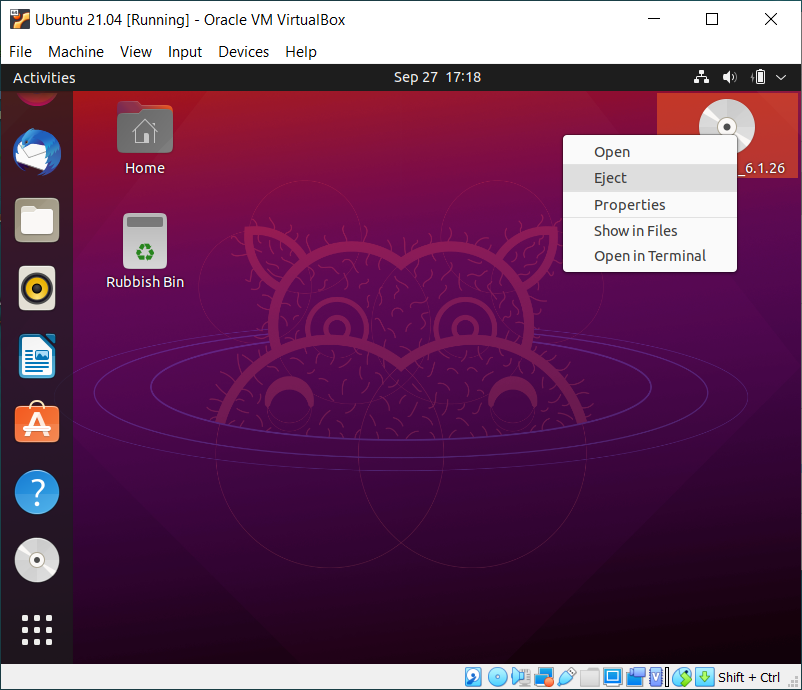
Log in again. Eject the Guest Additions CD by right-clicking the VBox_GAs_6.1.26 icon — either from Taskbar or the desktop area — to select Eject.
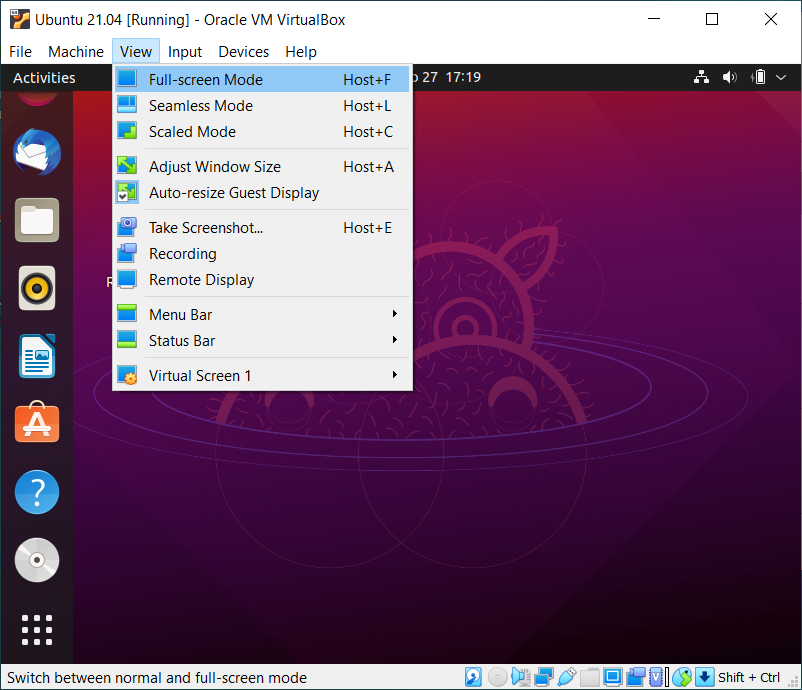
Now, change the display to the Full-screen mode — as a way of checking the improved graphics — by selecting from the virtual machine window menu — or by pressing Host-key+F. Click Switch to confirm.
Your Full-screen mode should look like this:
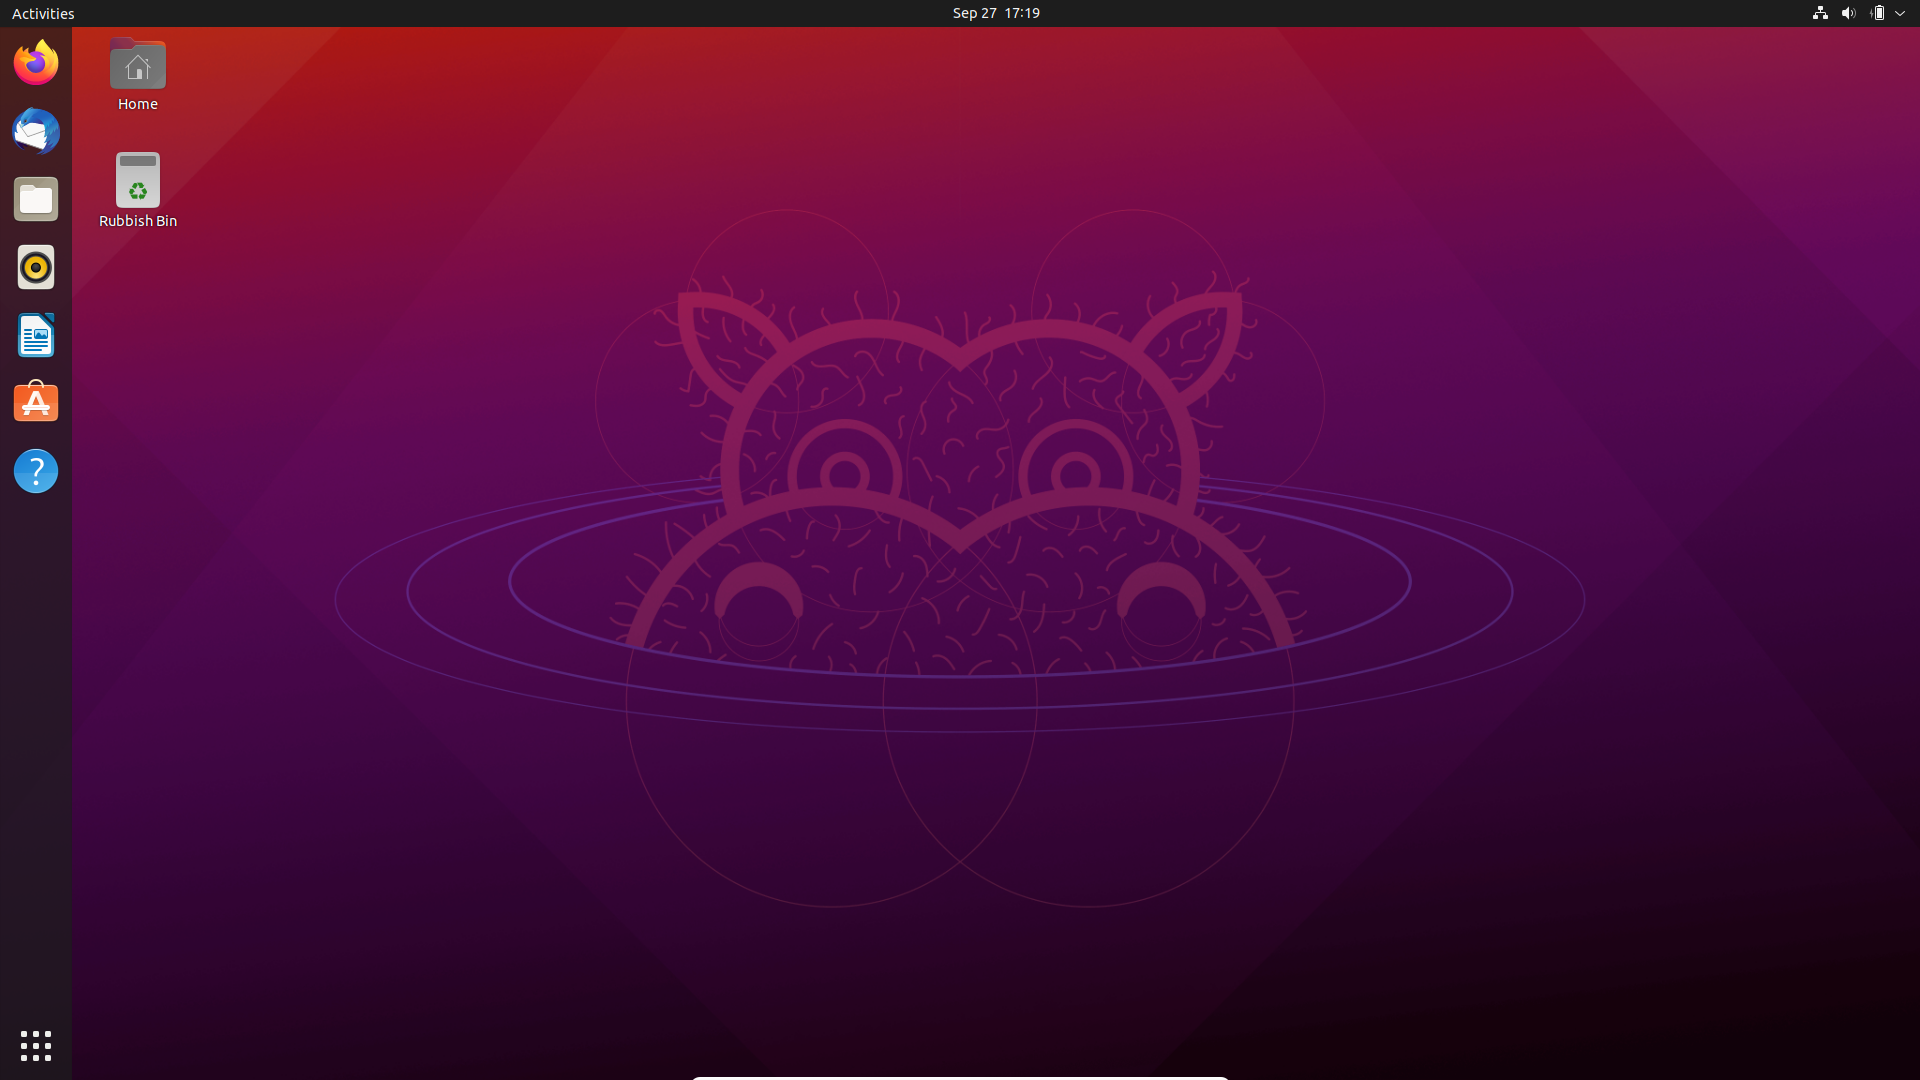
In case Ubuntu Desktop does not fit to full-screen, run Ubuntu Settings to configure your screen resolution accordingly under Screen Display → Resolution.
|
To return to the previous windowed mode, first, raise the control bar in the bottom centre of the desktop, and then click the second to last icon  .
.
To turn off the virtual machine, select the Power Off/Log Out → Power Off… menu. Click Power Off.

Post-installation Configuration
Virtual machine settings
Click Settings to customise your virtual machine.
Some of the recommended ones are listed below:
-
General → Advanced: EnableBidirectionalfor theShared Clipboardoption. -
System → Processor: Move theProcessor(s)slider to set about half of available threads (i.e. to the end of the green bar). -
Display → Screen: Move theVideo Memoryslider to its maximum (i.e. 128 MB). -
Audio: Turn offEnable Audiounless you specifically need it in your virtual machine.
Increasing video memory size limit
Virtual graphics drivers utilise the system video memory up to 128 MB by default. This size limit can be increased to 256 MB using the VBoxManage.exe utility.
1: With the virtual machine turned off (but you don’t have to close down the Oracle VM VirtualBox Manager), run Command Prompt (i.e. cmd.exe) as administrator.
2: Navigate to the virtual machine folder (e.g. 'S:\mf\Ubuntu 21.04').
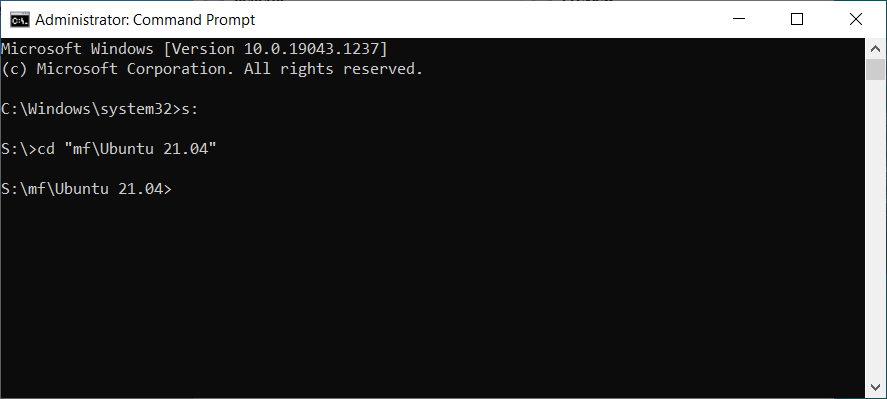
3: Enter the following command in the Command Prompt console. Make sure you type the machine name without the '.vbox' extension:
"C:\Program Files\Oracle\VirtualBox\VBoxManage.exe" modifyvm "Ubuntu 21.04" --vram 256
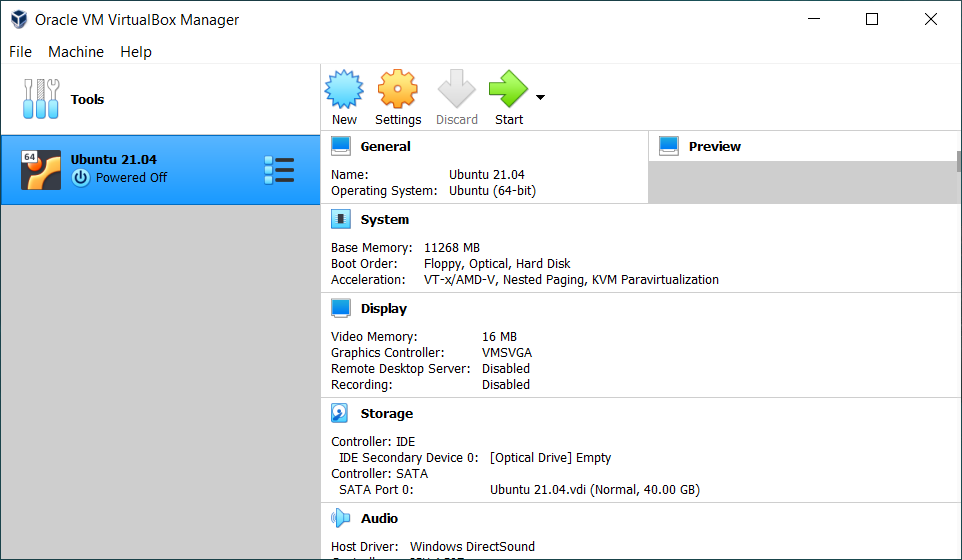
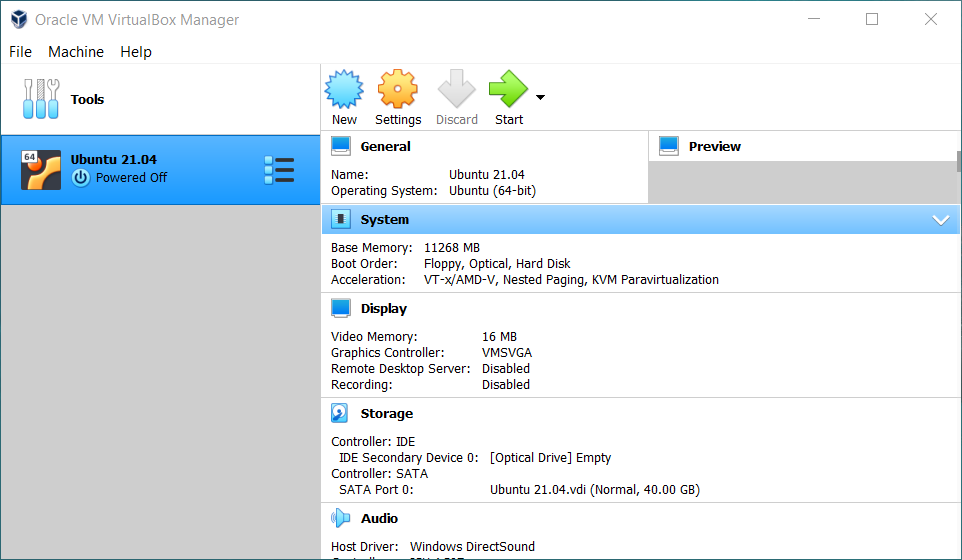
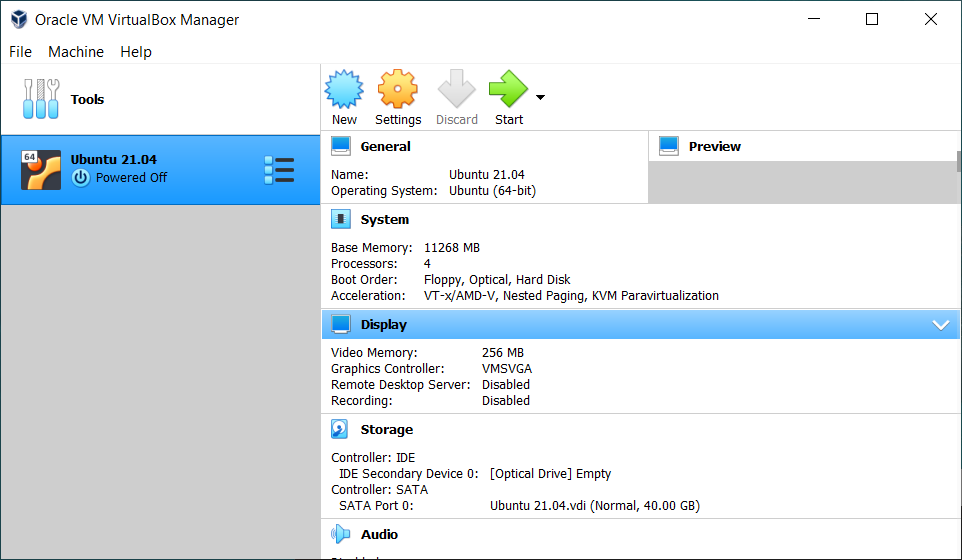
4: Check the size change of the Video Memory under the Display section in the virtual machine details pane.
Shared Folders
To work seamlessly between your guest and host operating systems, you may establish a shared folder.
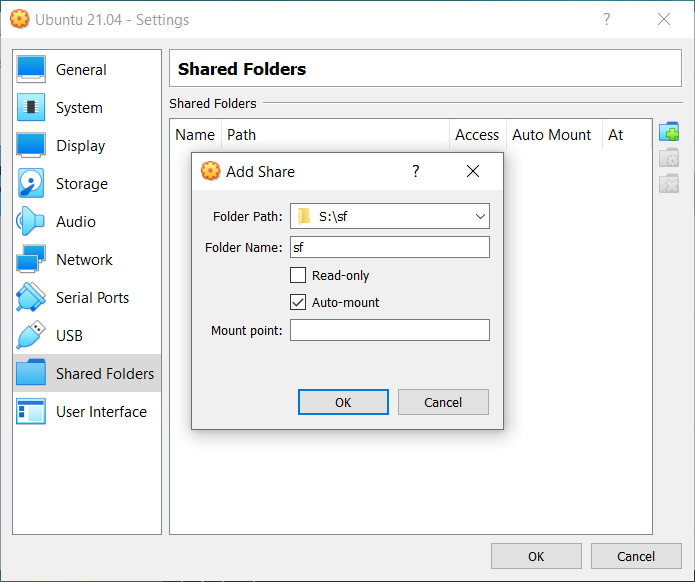
1: Click Settings to go to the Shared Folders section. Open Add Share dialog by clicking  (
(Adds new shared folder).
2: Browse with your target folder to share (e.g. 'S:\sf' ) to the Folder Path selection.
3: Enable the Auto-mount option if you wish, and click OK.
4: Exit from the Settings window, and then restart your virtual machine.
5: After logging into your Ubuntu Desktop, open a terminal to enter the following command:
$ sudo adduser $USER vboxsf
6: Restart the virtual machine, and enjoy Ubuntu!